Reviewed Apr 13, 2021
This article uses the open source streaming software OBS which can be obtained for free at
https://obsproject.com/download
This article a transcription of the following video by Gregor Beyerle:
Hardware Connections
If you want to stream with your headphones on then connect them to your
phone's output on the StudioLive ARc mixer.
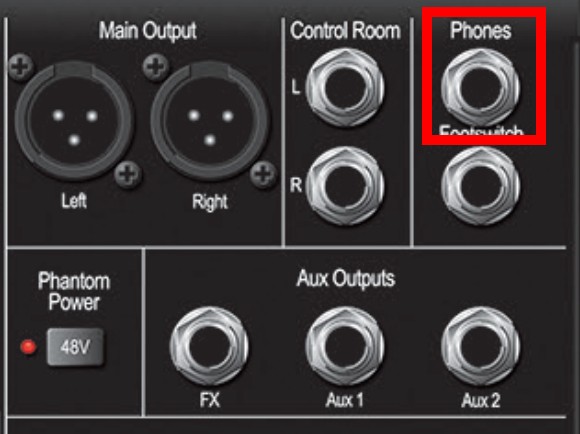
Connect your speakers to the control room left and right output on the StudioLive ARc
mixer. This will allow you to exclude certain things from your monitor mix on
the speakers such as your microphone which you might not want to hear but
still sends a signal out to your stream audience.

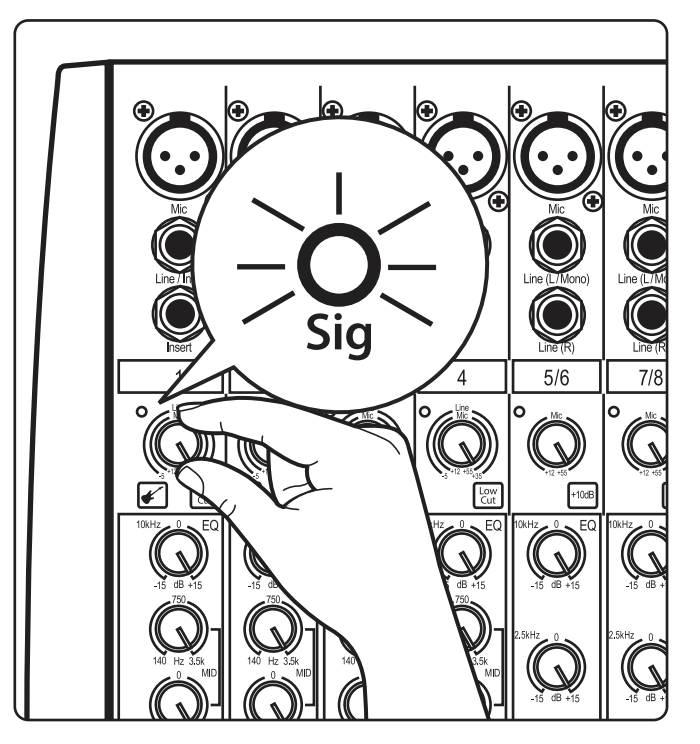
Next, take your XLR cable and connect your microphone with it to Channel 1.
If it's a condenser microphone then activate 48 volt phantom power now.
Turn up the gain on the microphone until you see the green LED blink when you
give a signal.
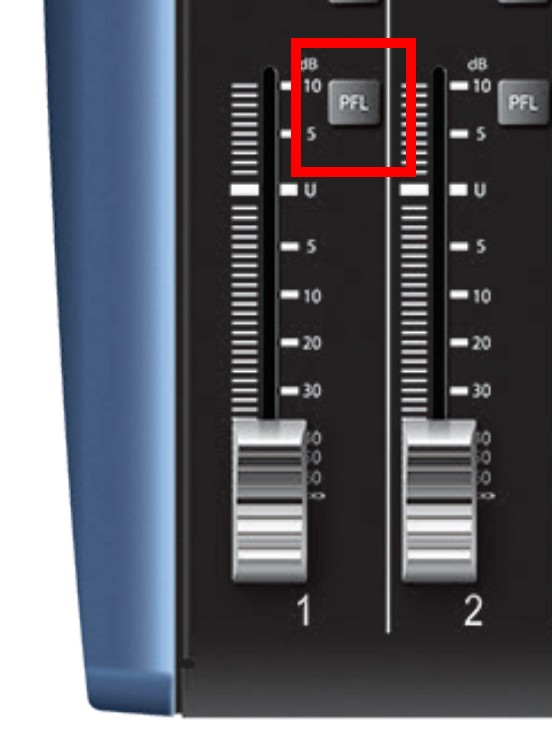
Now it's time to turn off the main volume and the volume on input 1 and you
should see some level as soon as you give the maximum signal.
If you want your microphone signal to only go out to your audience but you don't
want to hear it on your speakers then activate the PFL button on input 1.
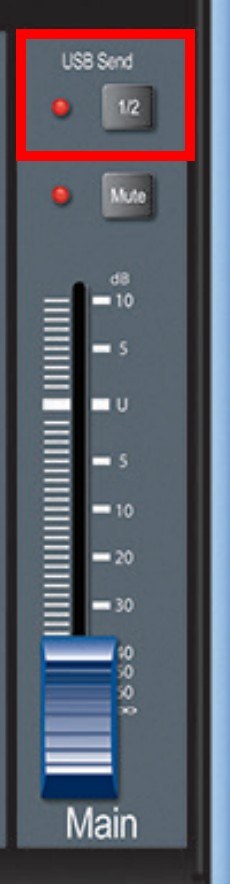
Finally we have to get the computer audio into a streaming software as well.
The super channel on the StudioLive ARc is perfect for that as it allows
us to do so without any extra cabling required. Just press down the USB return
button and you're good to go.

Certain software such as OBS only received the first two software inputs.
Simply press down the USB sent 1/2 button above the main volume fader
to route your audio to these first two software inputs.
Software Connections
Now let's look at the software side of things. In Studio One 5 go to
preferences>audio setup and just ensure that the StudioLive ARc mixer is
chosen as our recording and playback device.
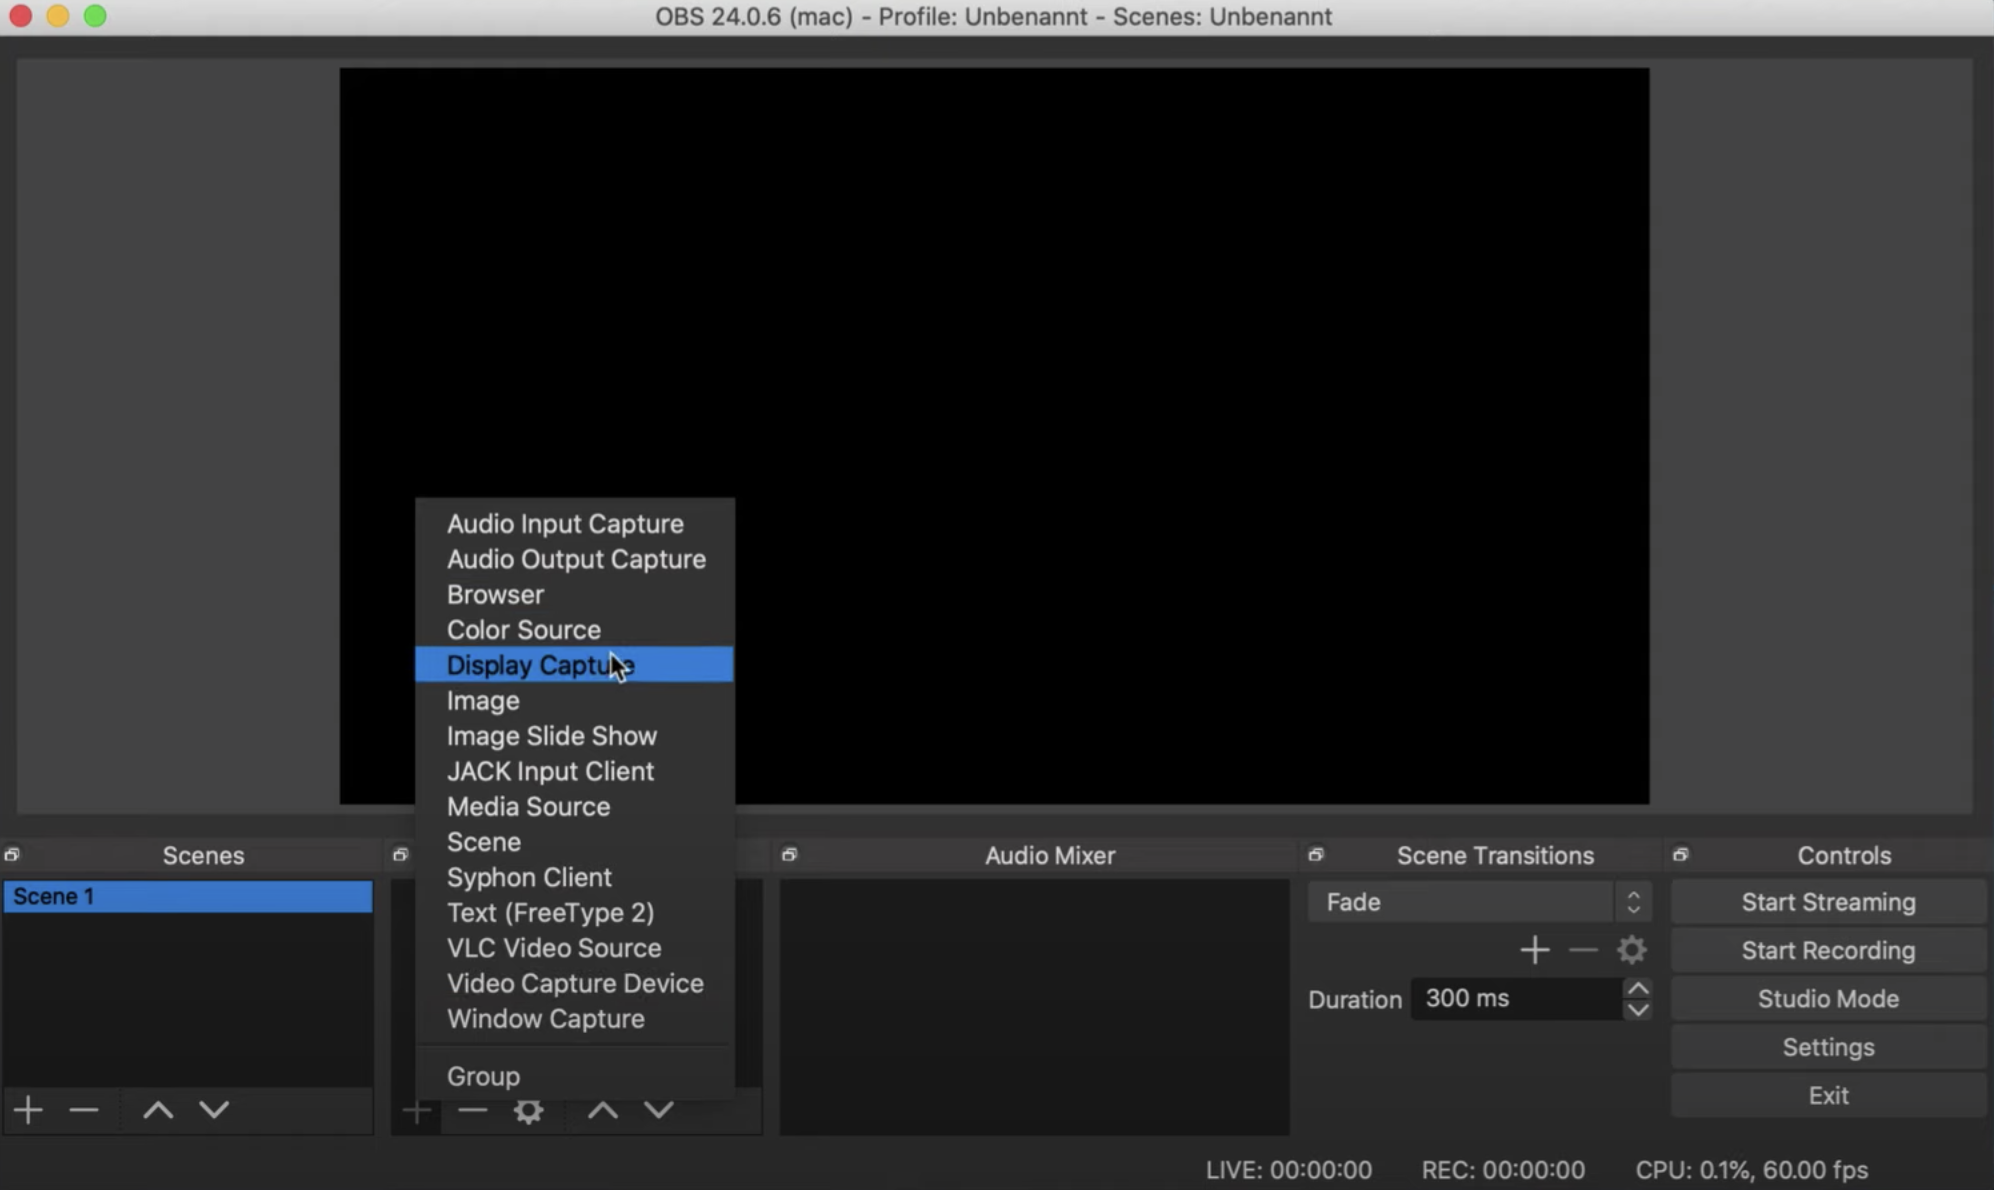
Now we can already switch to OBS. We have to add a couple of sources.
The first display source that we want to add is probably a screen
so we click on that plus here in the sources window and choose display capture
hit enter and your display screen should be visible in OBS.
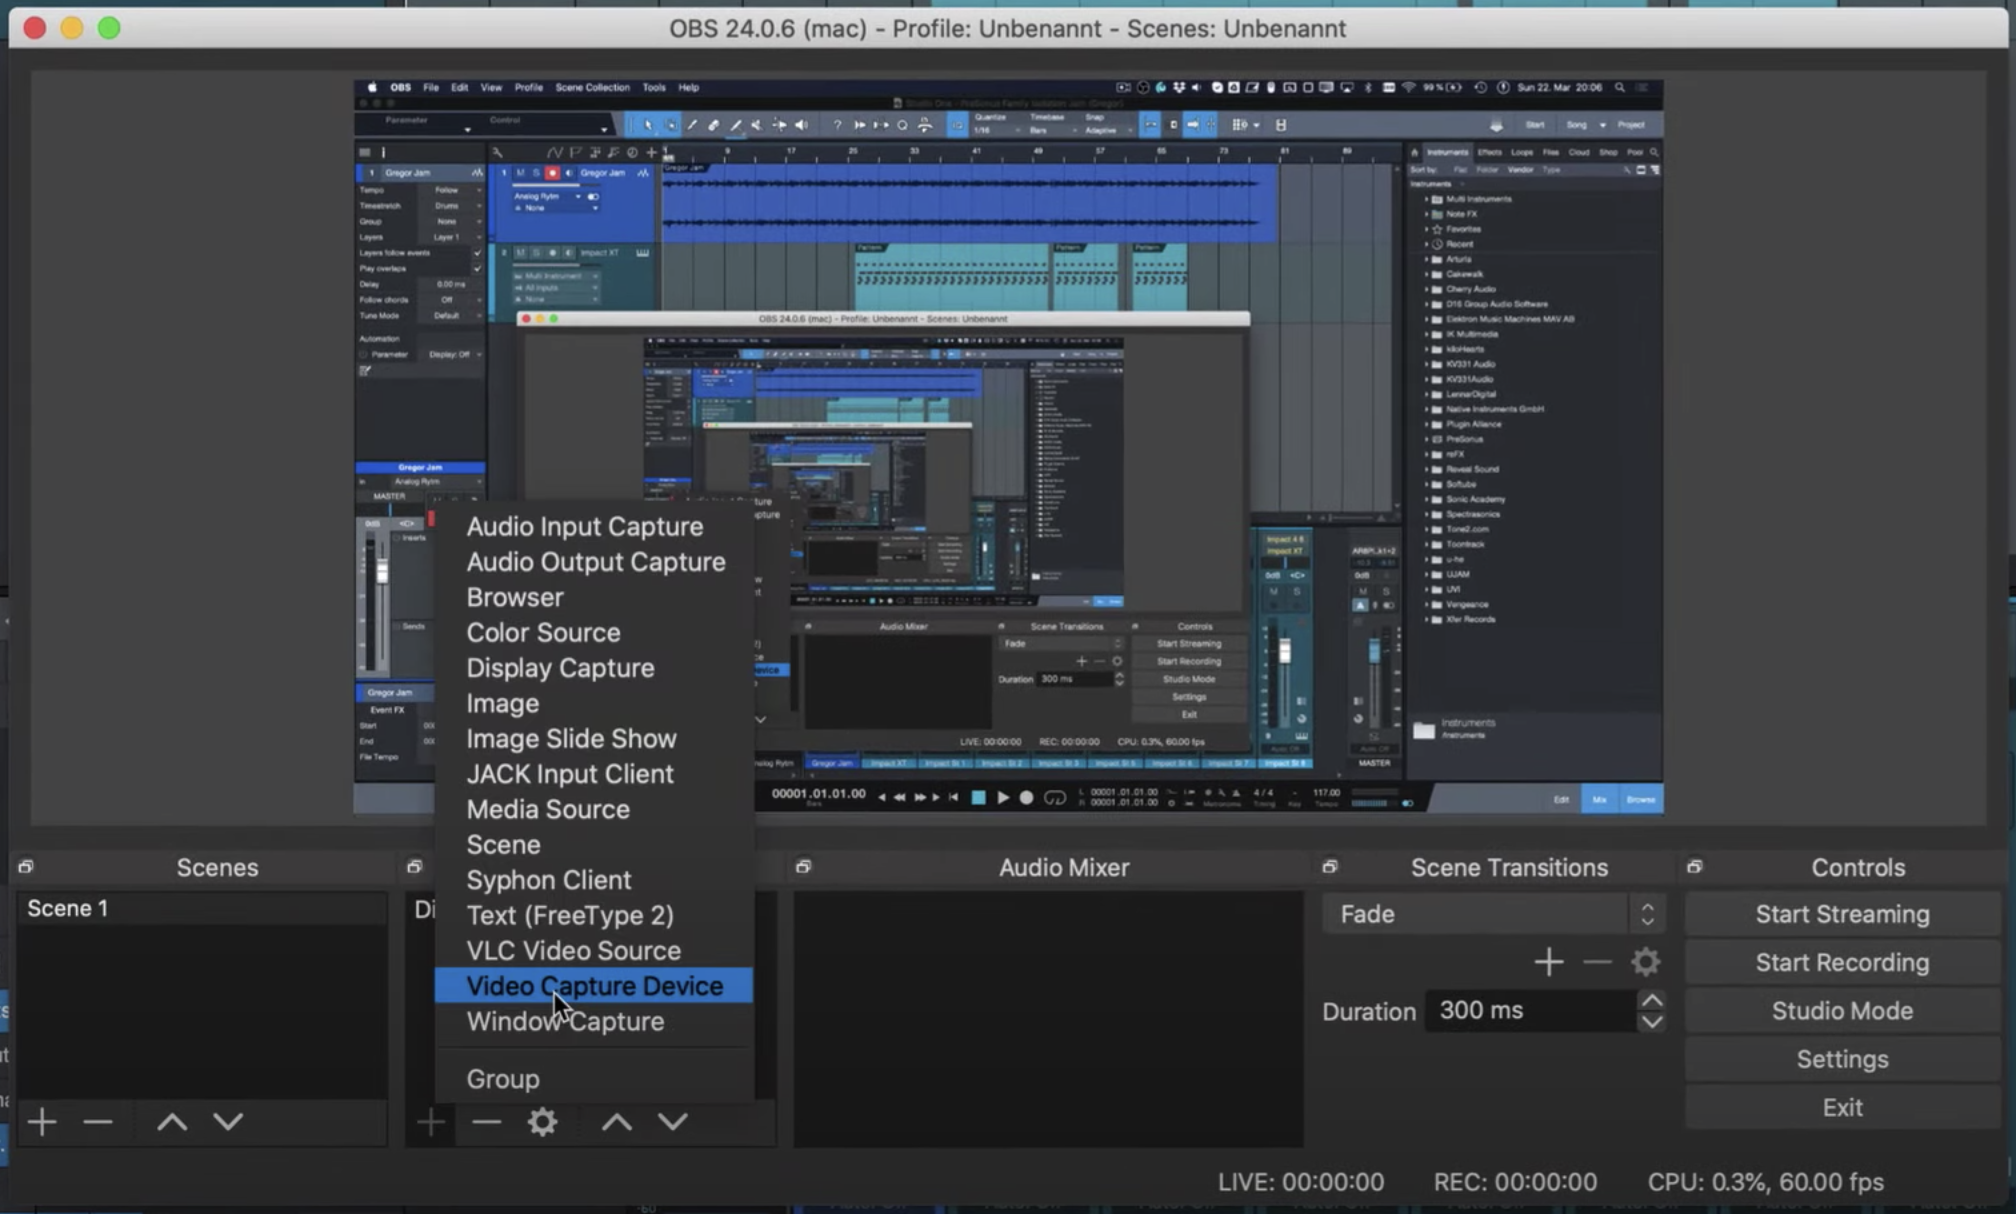
Next I also want to add my camera to the setup and that you can do also by then
selecting video capture device. I'm calling that DSLR for my camera and hit OK
and as soon as I select my HDMI input here you will see your camera and that's
also added to my stream.
Ok so we're basically almost there now let's talk through the necessary preferences
in OBS and we can get started.
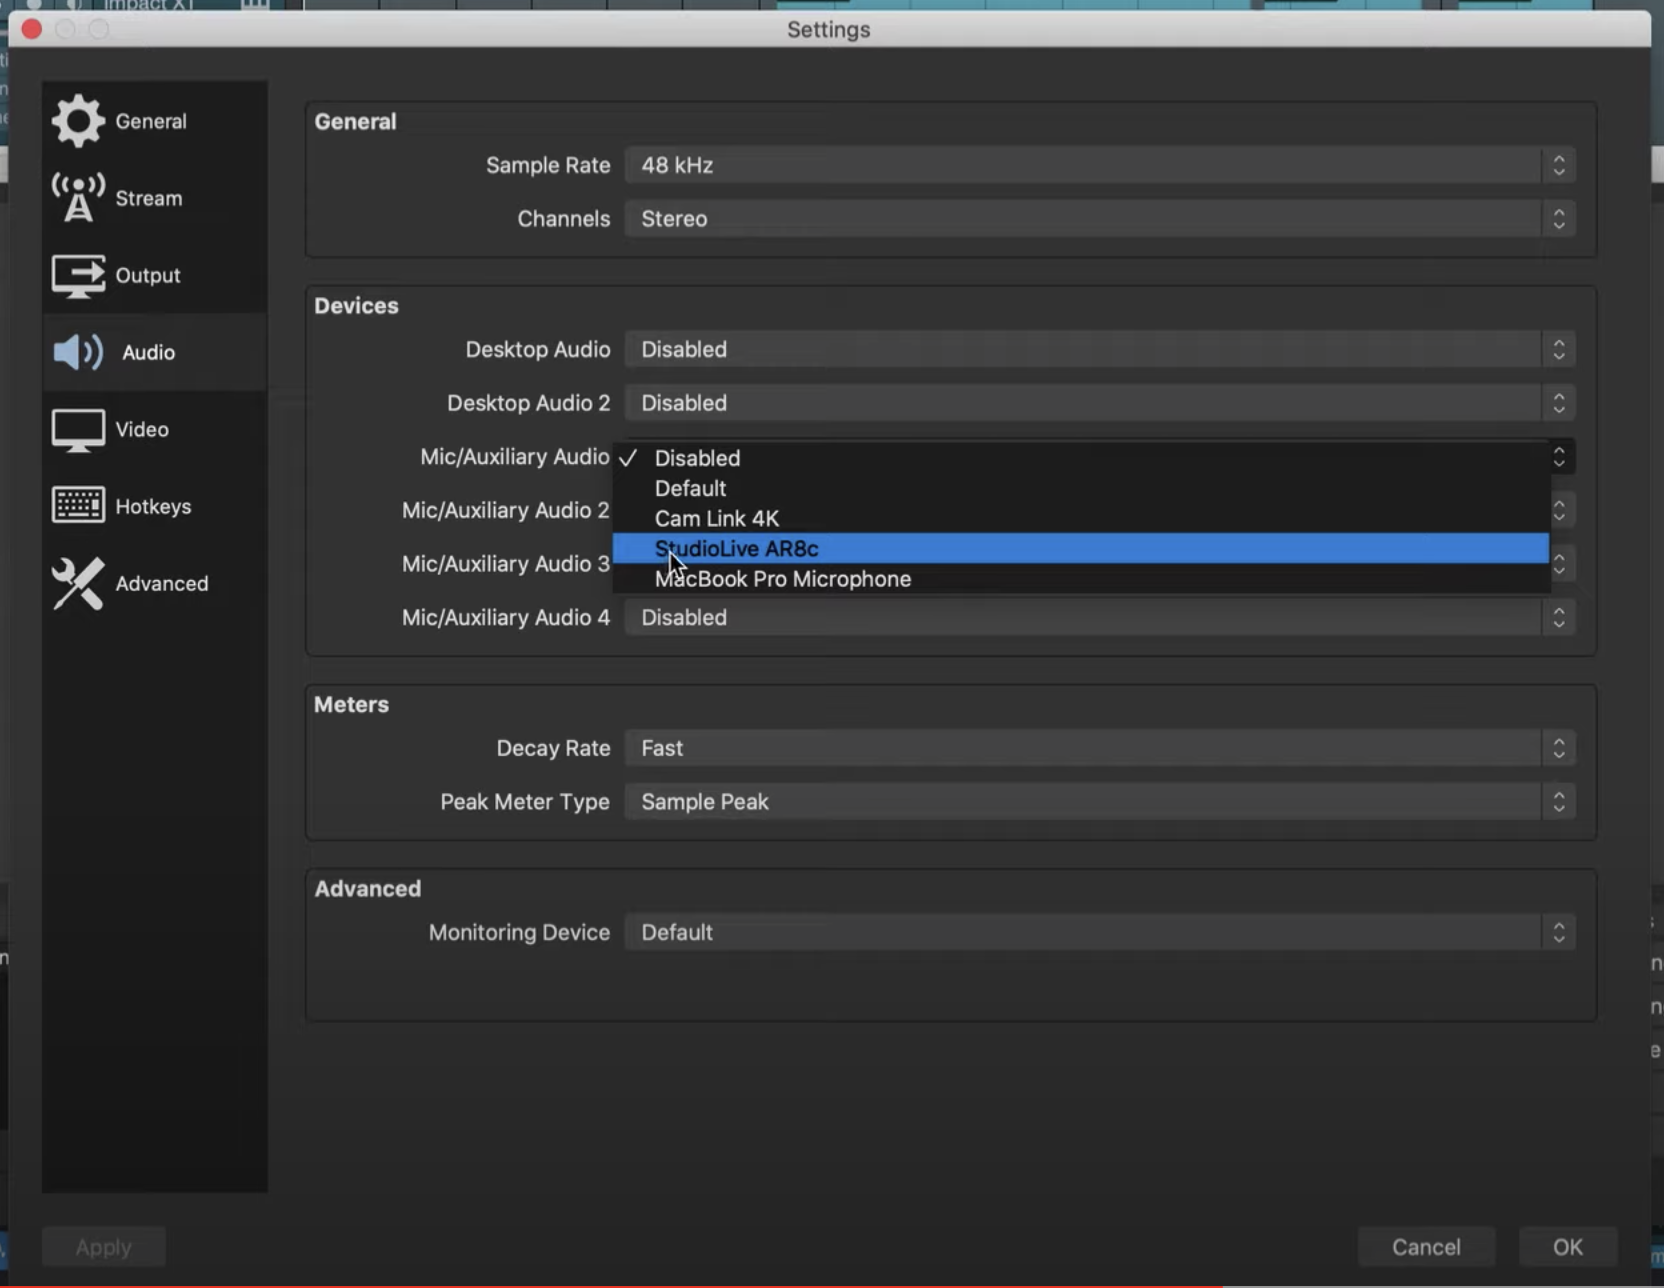
The most essential settings for us are nested in the streams output and audio tab.
Let's start with the audio tab so go there and as a mic auxiliary audio input you
want to choose our StudioLive ARc once again.
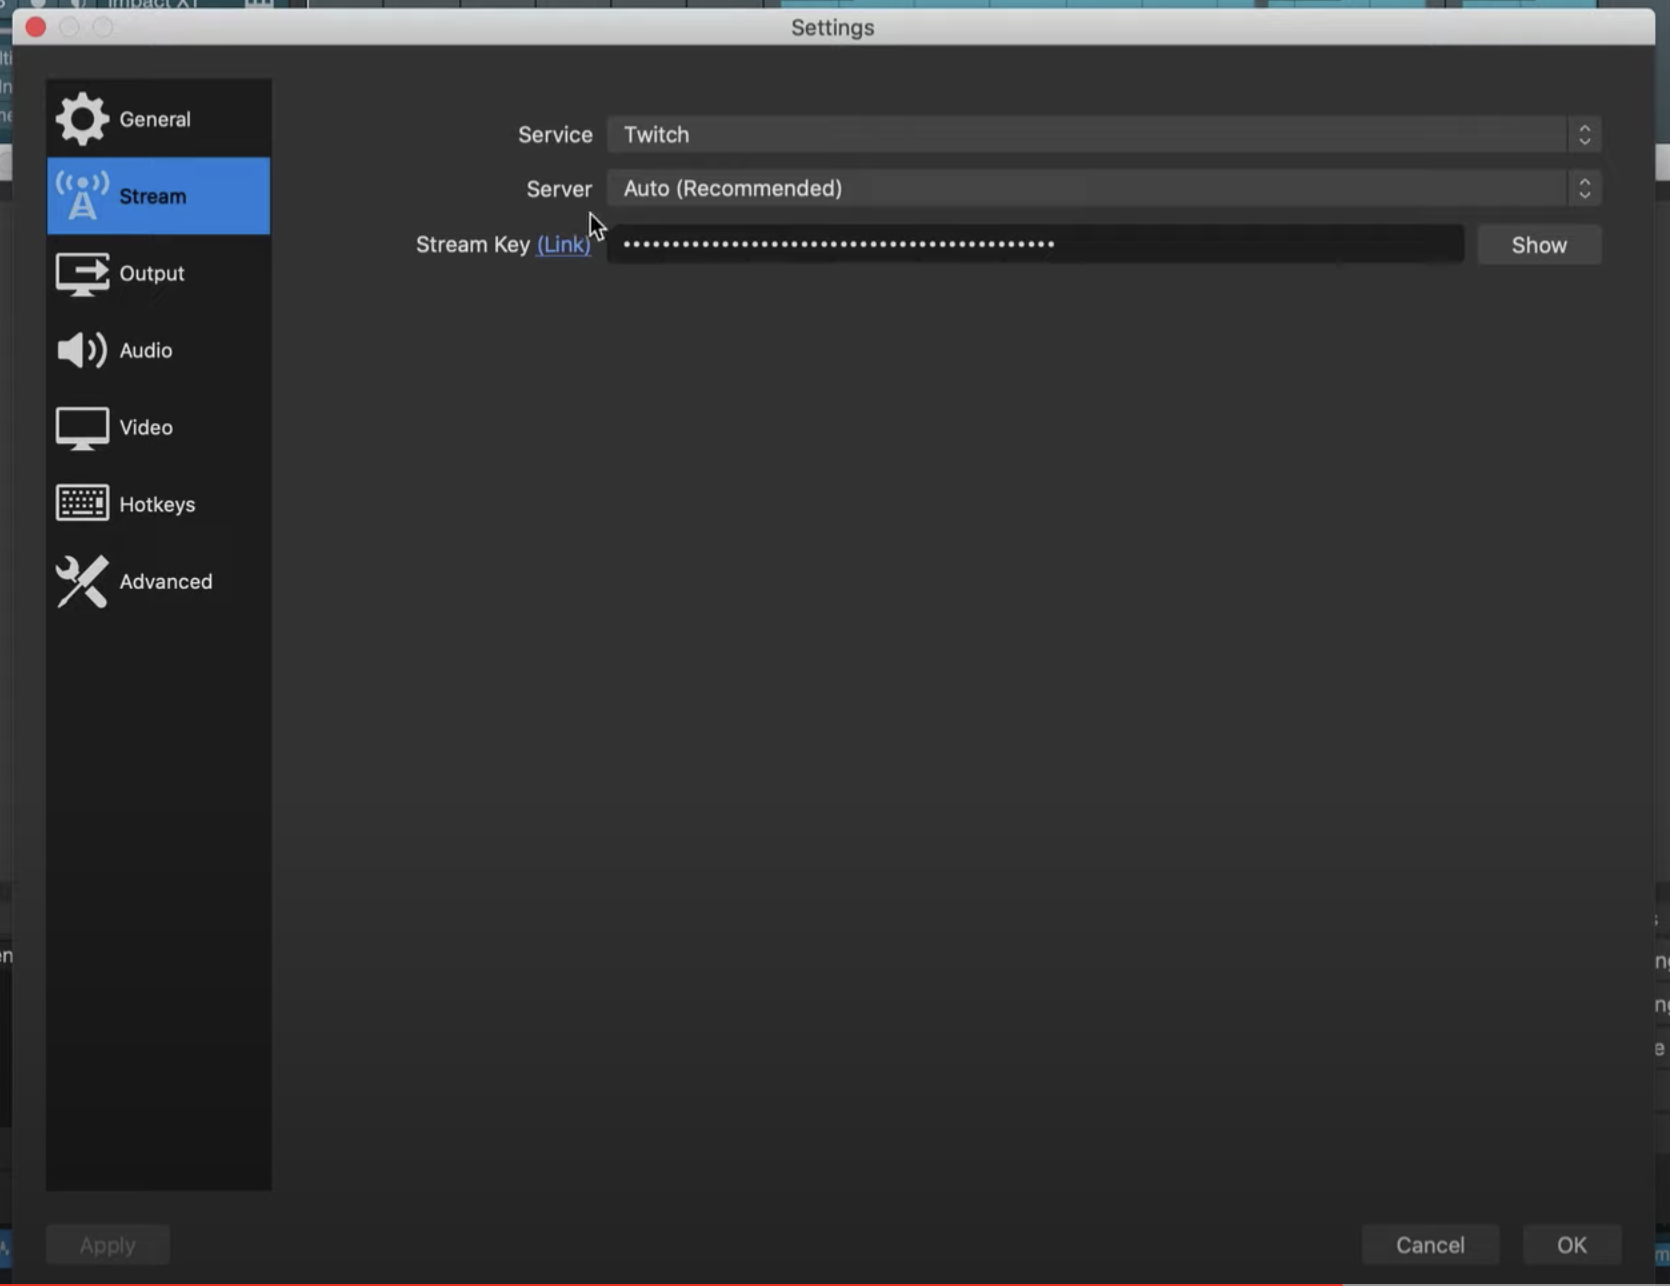
Next we need to connect to a stream server so that we can actually connect to our
audience in the first place. There are options such as Facebook live, YouTube,
Twitch and you can also add your own custom address.
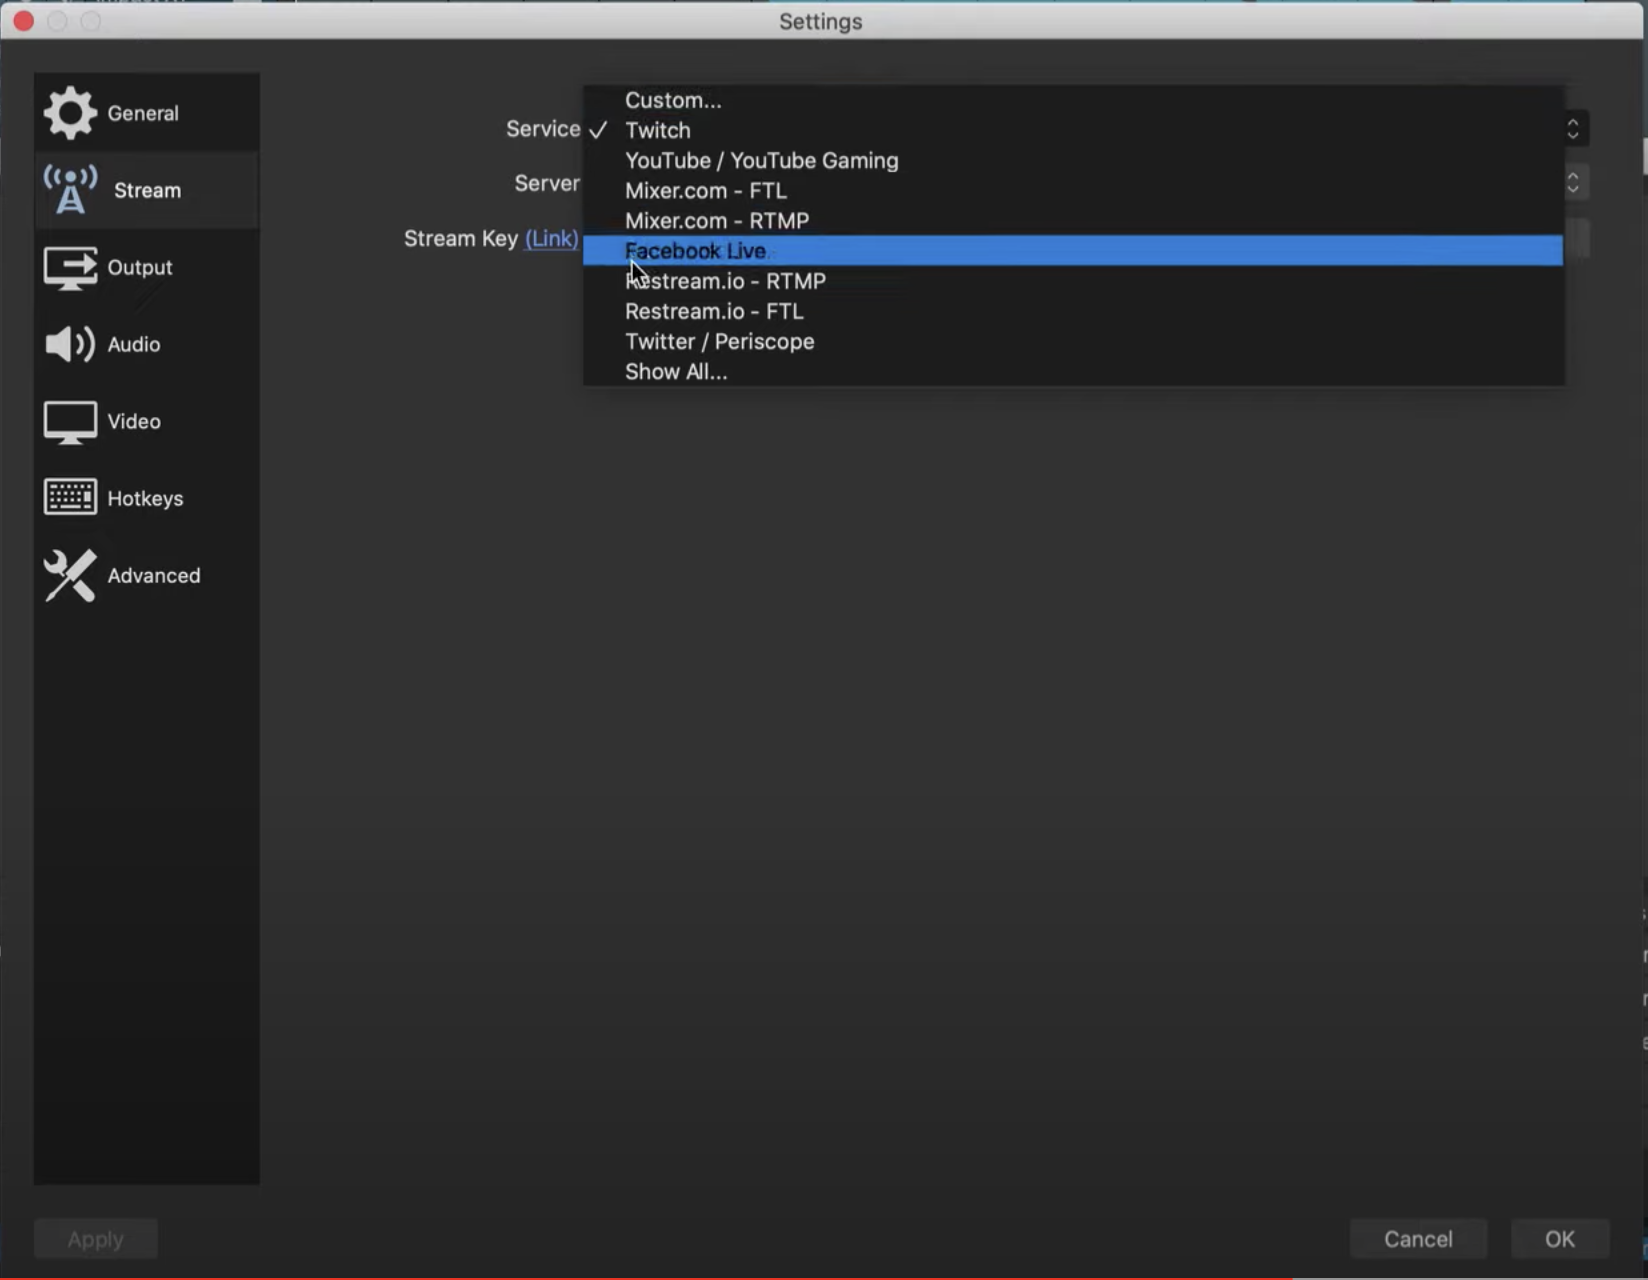
If you're going for one of the big streaming platforms out there such as YouTube
or twitch then you also need a stream key. Which you can obtain by clicking on the
link in brackets and following the instructions.
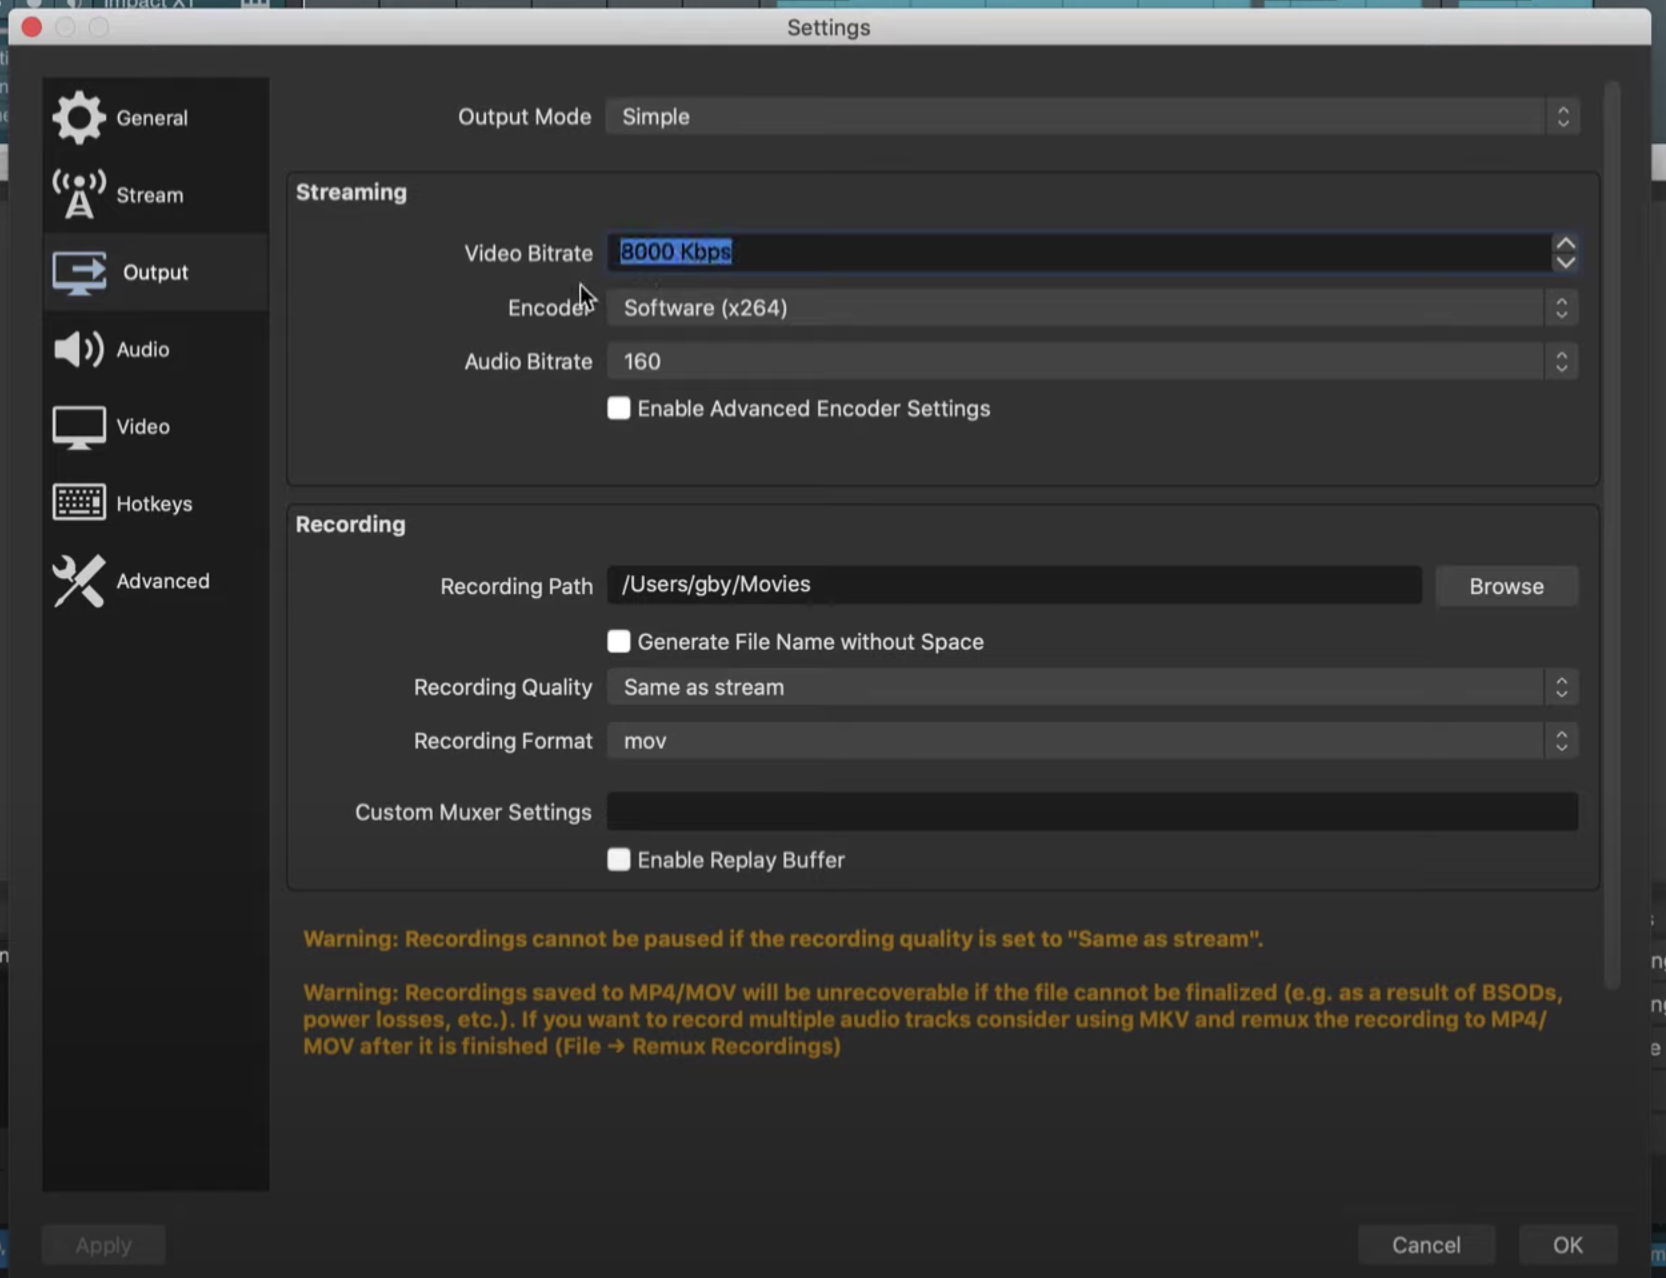
Last but not least we want to go to the output tab and it's really critical to set that
right so that you can stream in the best possible quality without asking too much
of your internet bandwidth or your computer.
If you have a computer that's not so great and an internet connection that's kind
of slow you probably want to stay between two and a half and maximum eight
megabits per second which is equalled to 8000 kilobits per second.
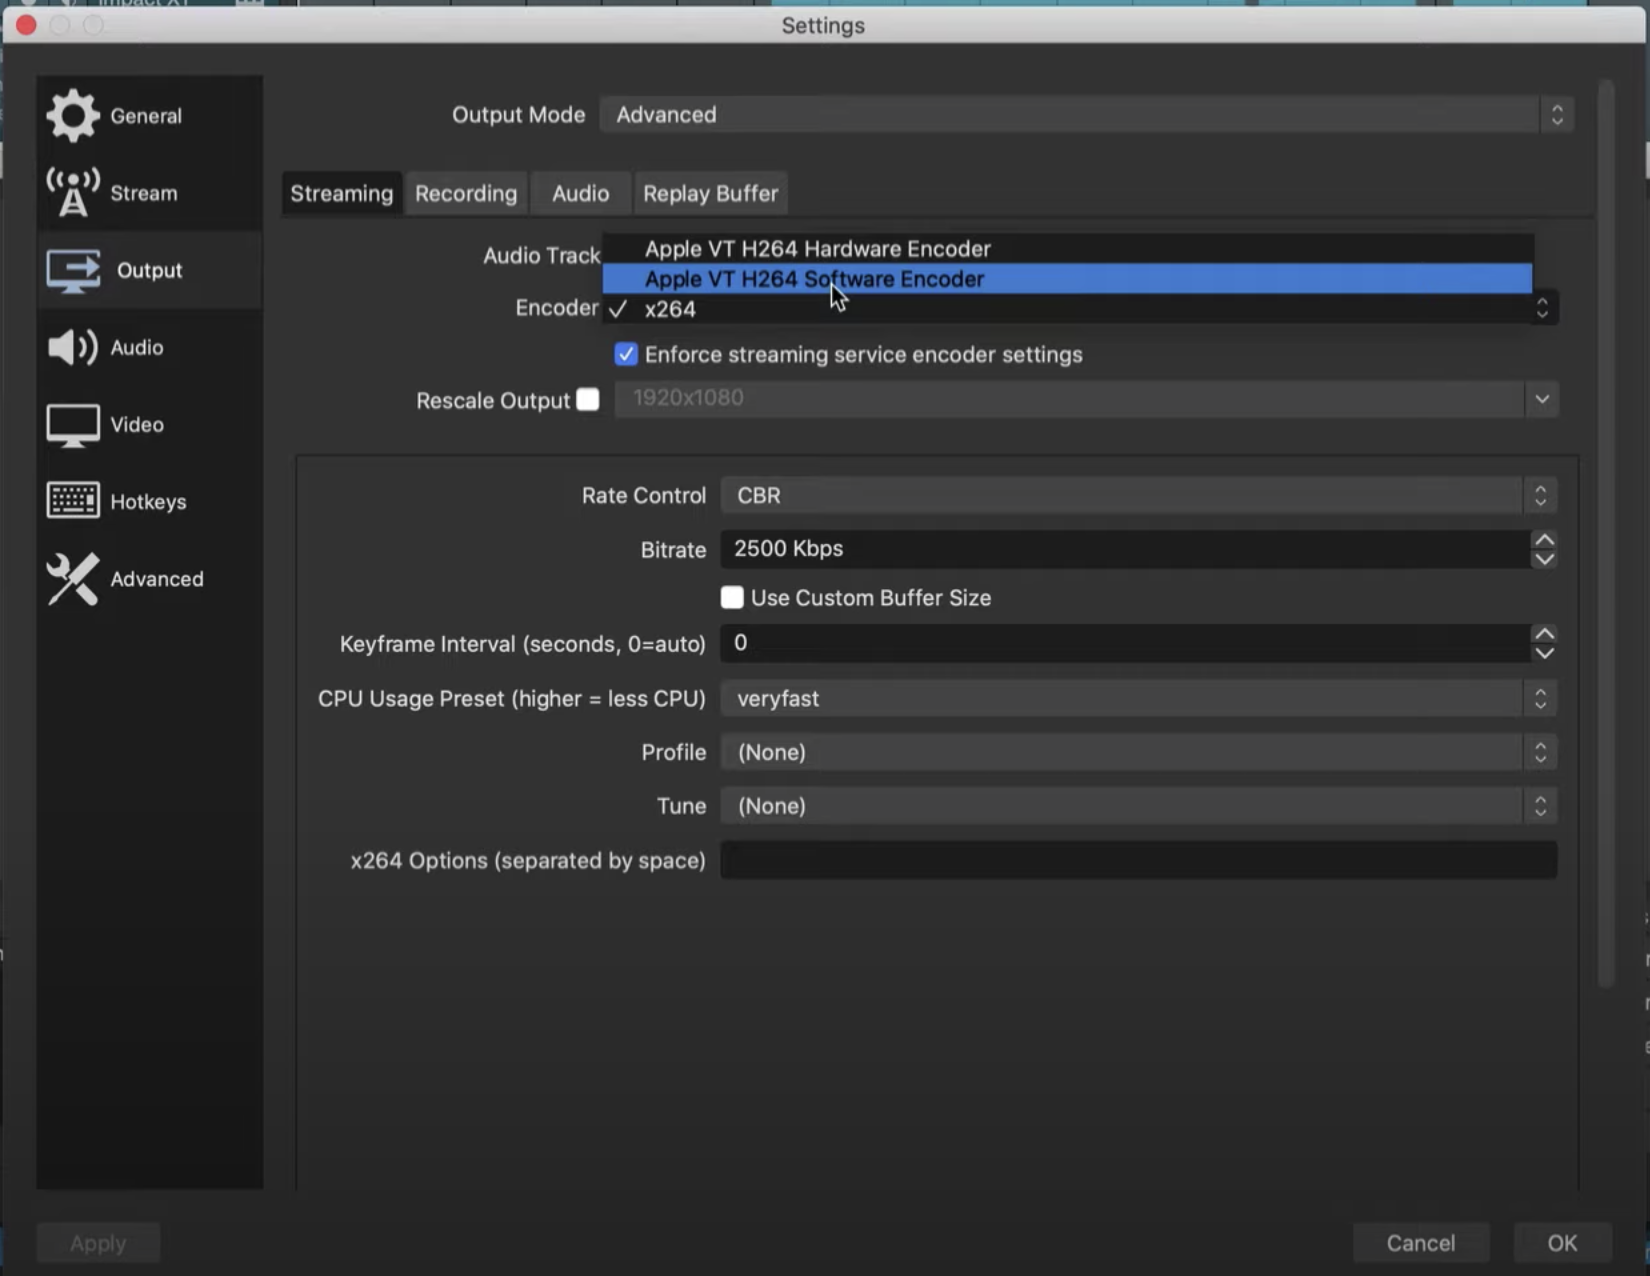
If you require a higher bitrate then there's one setting in the Advanced section
that I would recommend to you and that is to change your software encoding,
which is handled by the CPU to hardware encoding, which is managed by the
graphics card, the GPU.
This is because audio streaming is mainly taxing the CPU in the first place
and if your CPU is handling all the encoding duties you might reach your
performance limits very quickly.
There are many more settings that you can configure in OBS but these ones should be more than
enough to get you started with a good looking and great sounding stream.
If you are experiencing issues then please contact technical support in the following link.
https://support.presonus.com/hc/en-us/articles/210050813-How-to-create-a-new-Support-Request-