Published June 17, 2014
PLEASE NOTE: This article illustrates the Legacy Universal Control version 1.7.x. Current versions of Universal Control differ from what is shown.
For direct outputting of each input to the corresponding channel output; input 1 --> output 1, input 2 --> output 2, input 3 --> output 3, input 4 --> output 4, input 5 --> output 5, input 6 --> output 6, input 7 --> output 7, input 8 --> output 8, etc..., you will need to select the output channel on the right in Universal Control and then solo the channels that match that output and link them in stereo.
See the screen shot for an example.
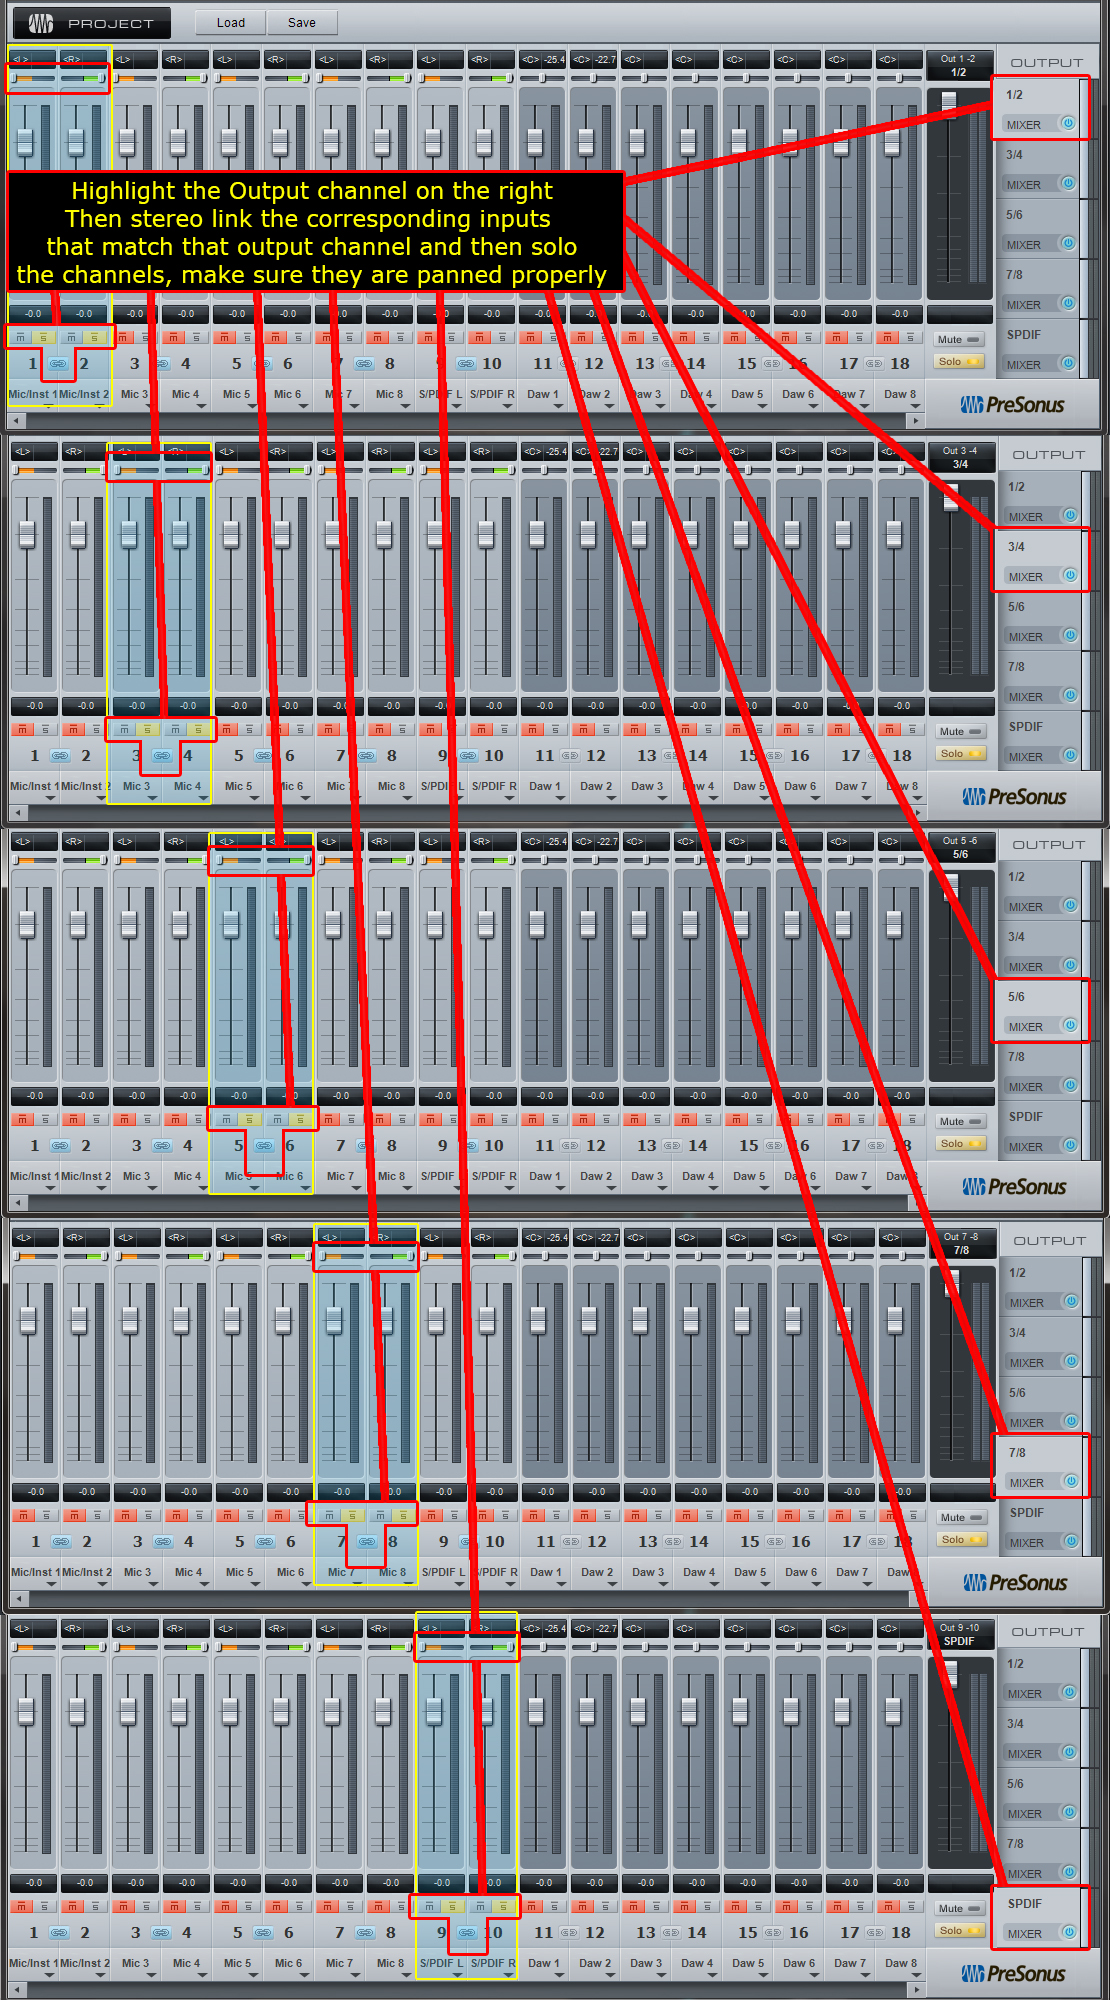
For example output channel 1/2, power it on and make sure it is highlighted. Then link the inputs that match that output channel, 1 and 2, link them in Stereo by clicking on the small chain ICON in between the channel strip 1/2 and then solo those channels by hitting the "s" button. This will pan the channels left and right and solo them, sending the input to the proper output channel; input 1 to output 1, input 2 to output 2. Repeat this for each output channel listed on the right; 3/4, 5/6, 7/8 and SPDIF.
Once you have this set up, you can save this as a preset and load it when you want to use the FireStudio Project as a direct input to output mixer.

An example of the browser window in Windows below:
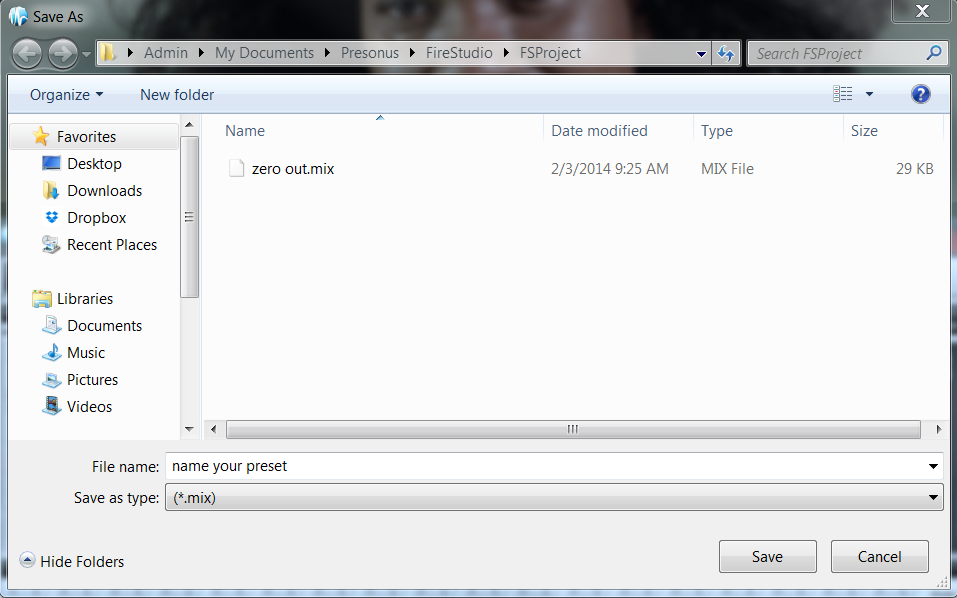
Once this has been saved, it can be recalled by clicking on the "Load" button and then selecting the saved scene to reload into Universal Control.

==================================================================
Please contact PreSonus Technical Support by creating a Support Ticket at My.PreSonus.com for further assistance.
>How to create a support ticket<