The following information explains the process for registering the Native Instruments - Replika plug-in with Native Instruments and activating it for use within Studio One.
***If you are running Studio One 4 Artist, you will need to be running version 4.6.1 or higher for the plug-in to show up. The plug-in will not show up in Studio One 3 Artist.
***For information on M1 compatibility, please refer to the article below...
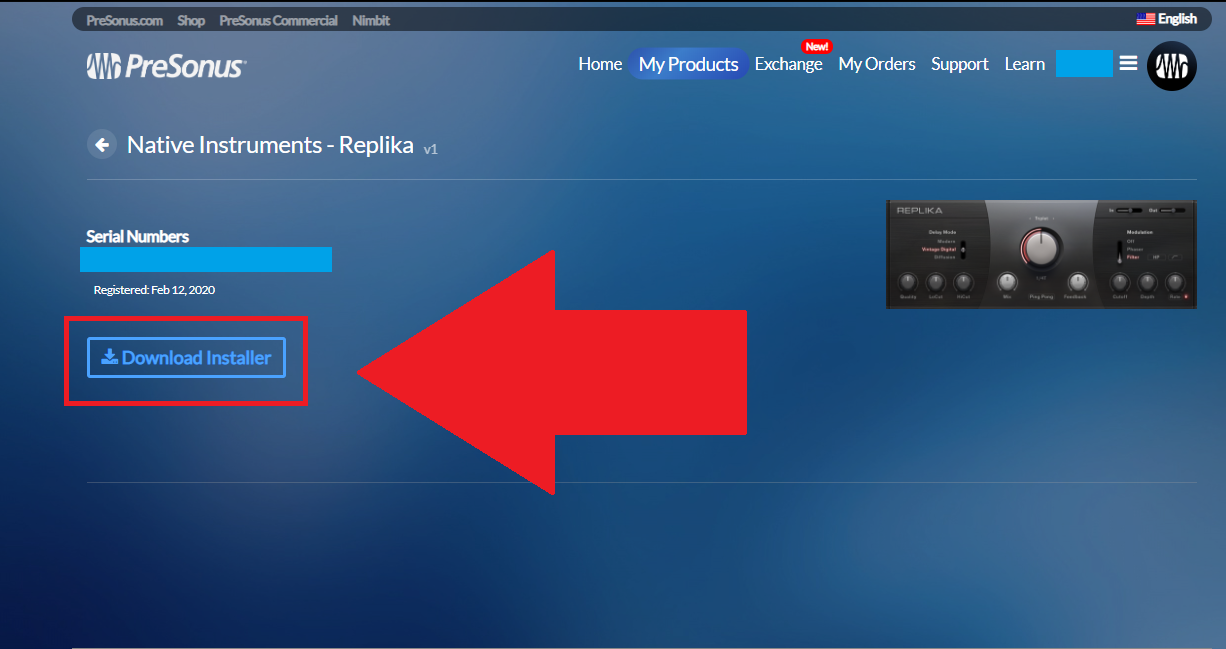
1. You can find your product key for the Native Instruments - Replika plug-in inside of your https://my.presonus.com account. Once you are logged into your account, just go to My Products>Add-ons to locate the plug-in. Below is a screenshot:
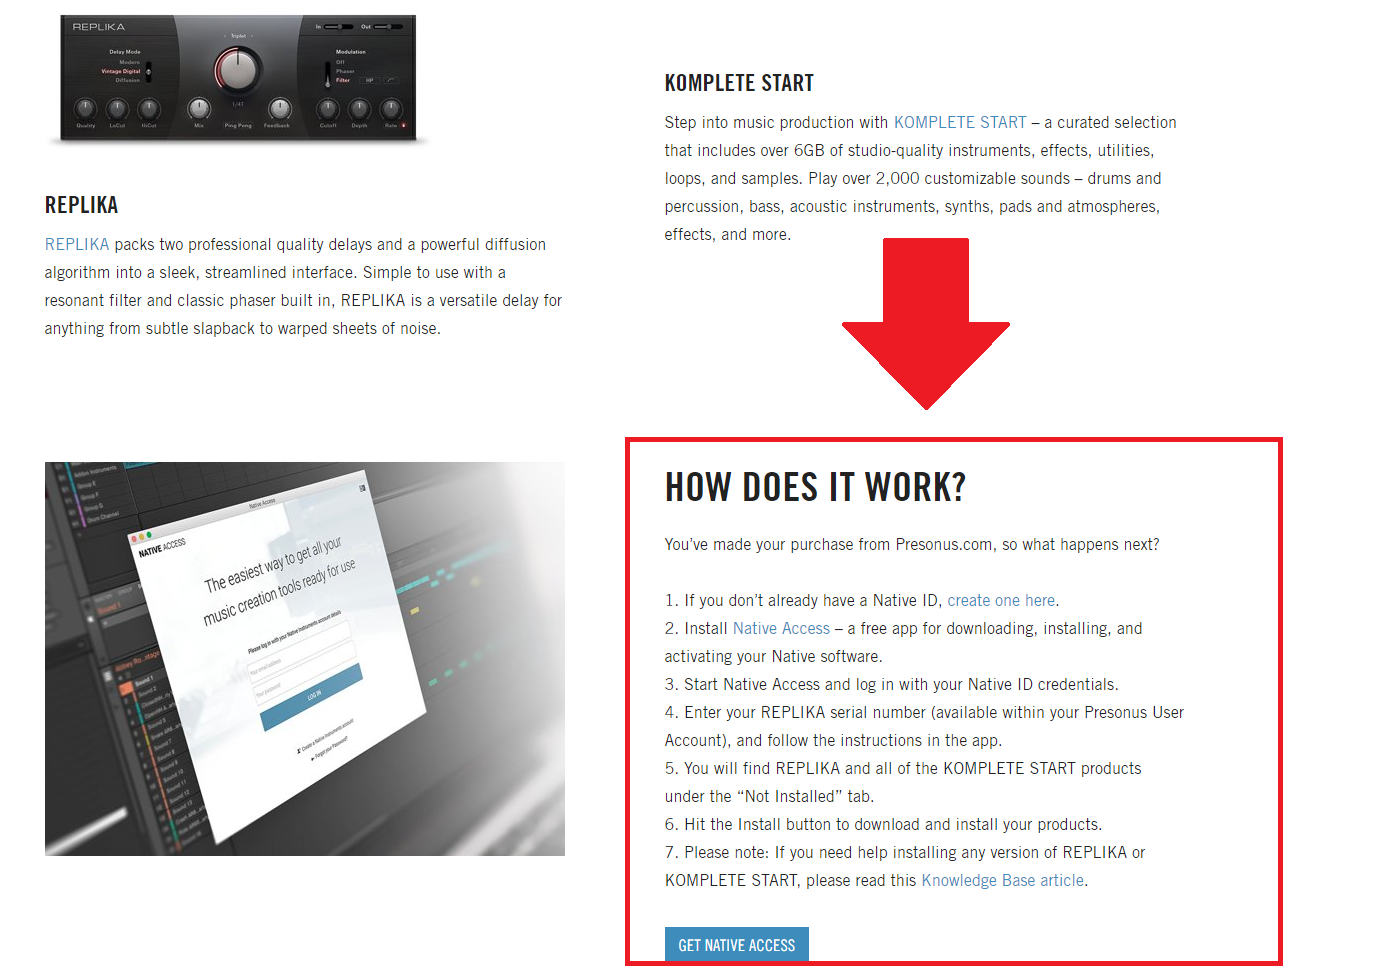
2. Once you click on the link to "Download Installer," you will be taken to the page below. Under the "How Does it Work?" section on this page, Native Instruments has provided exact steps to download/install Replika using the Native Access download manager.
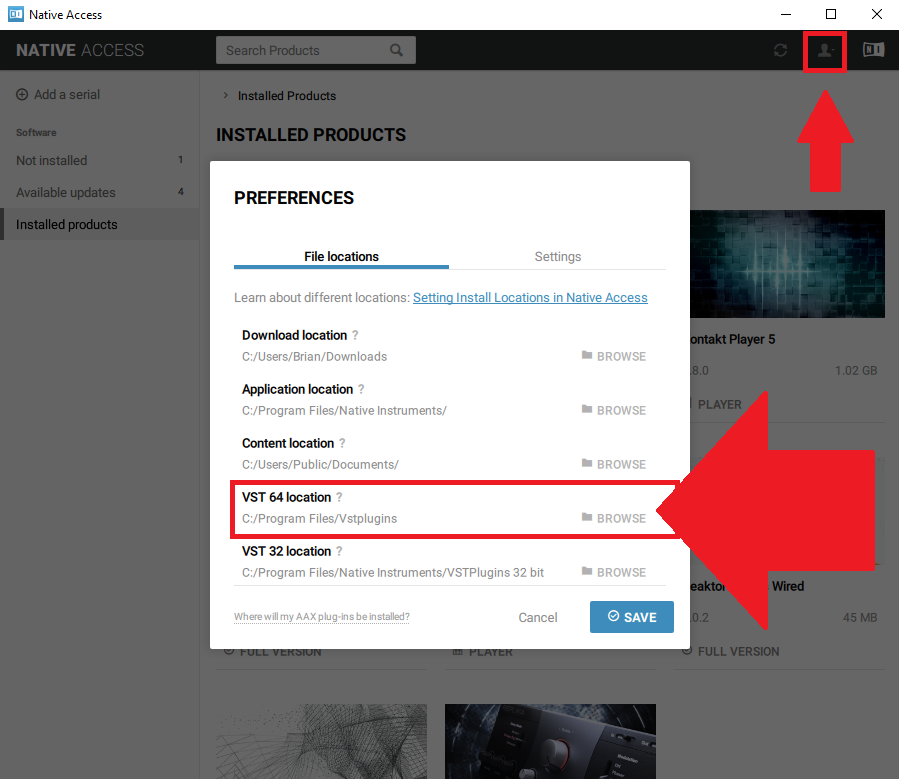
3. (Windows users only) If you are running Windows, once you have downloaded Native Access, you will need to click the icon of the head at the top right-hand corner of the screen as pictured in the image below and click on "Preferences." In the "Preferences" window as illustrated below, you will need to click the "Browse" button and select c:/Program Files/Vstplugins as your VST 64 location or a different location if you are using the "Professional" version of Studio One.
***If you are running the "Artist" version of Studio One 4 on Windows, you will need to choose c:/Program Files/Vstplugins for the VST 64 location for it to show up in Studio One. If you had already installed Replika, then you will need to re-install it after making this change.
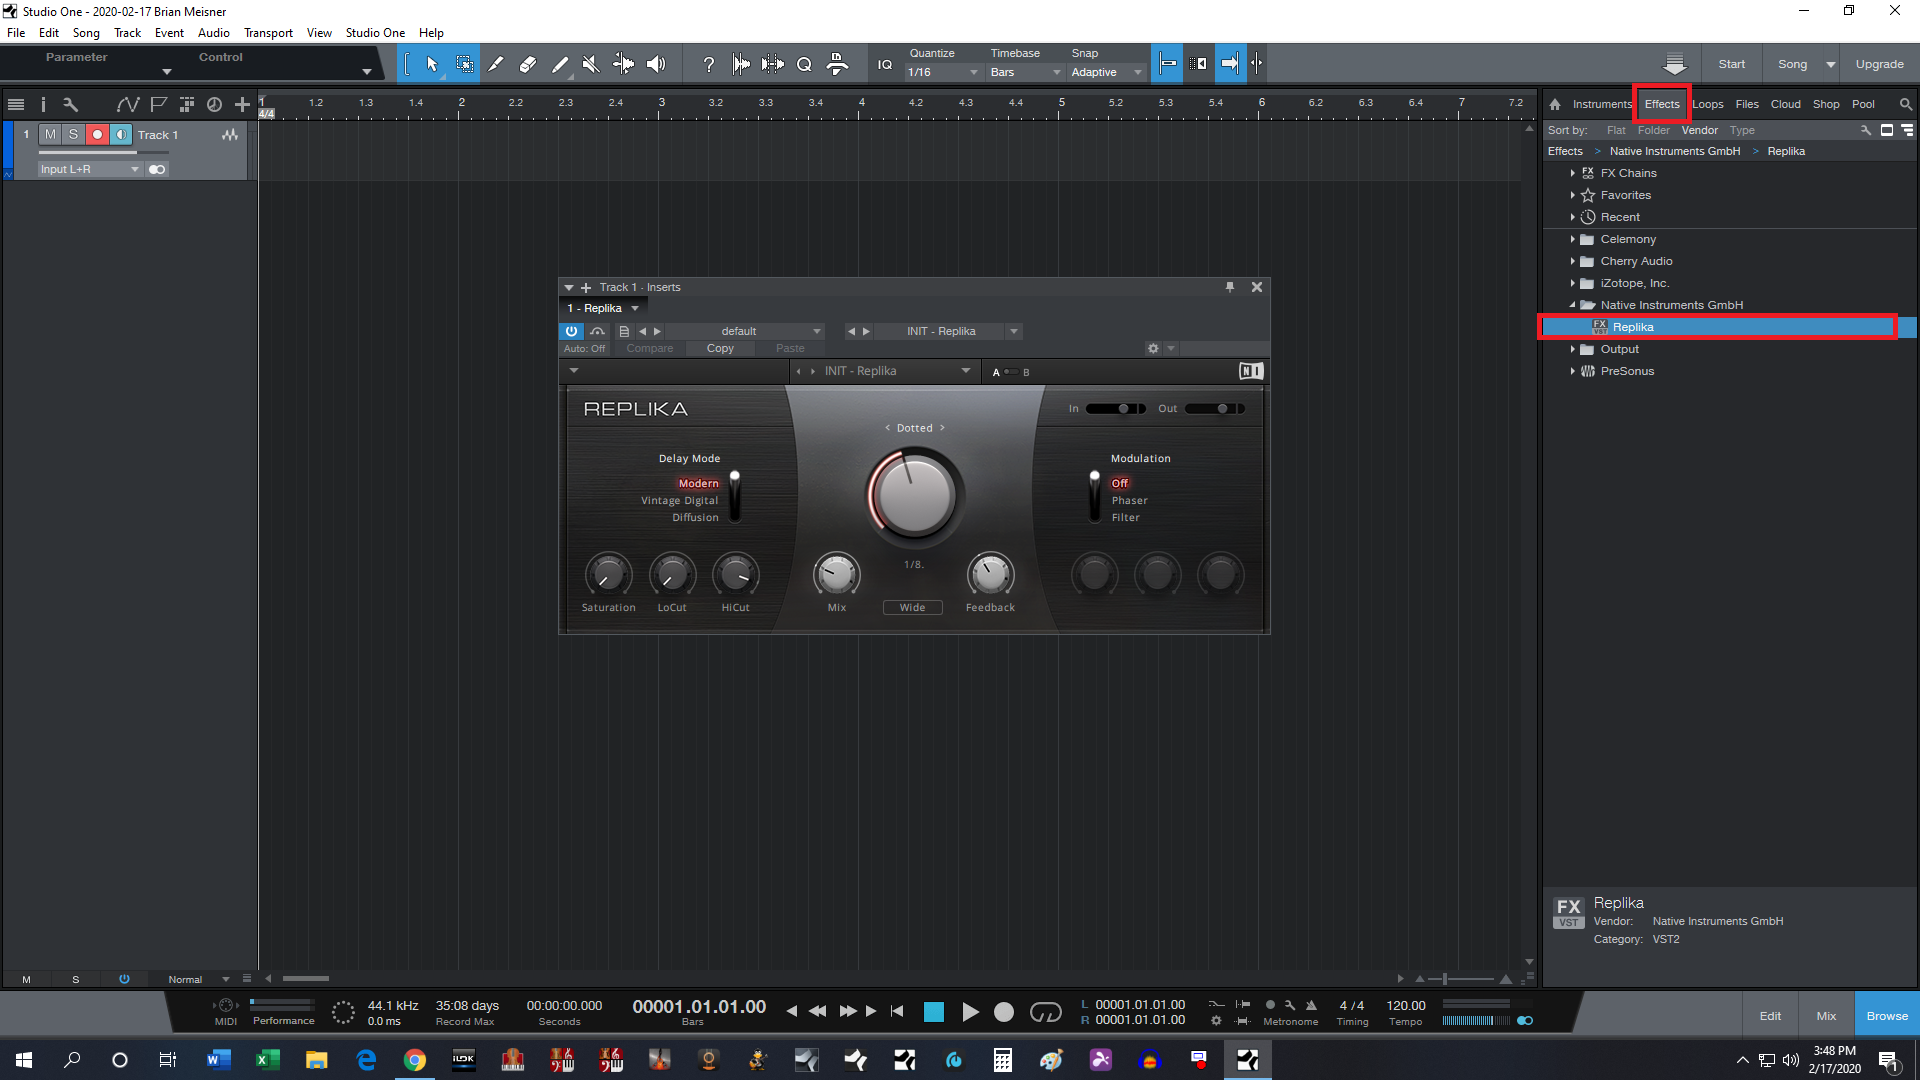
4. Once you have installed Replika on your system, you can open Studio One and begin using the plug-in. You will find it located under the "Effects" tab in the Studio One Browser. Simply drag it onto a track to use it.
Here is a link to Native Instruments' support page. https://support.native-instruments.com/