***Please Note: The functionality of Key Switches has been improved in version 5. Here is a link to the Studio One 5 knowledge base article on Key Switches.
https://support.presonus.com/hc/en-us/articles/360045543351-Managing-Key-Switches-in-Studio-One
The following outlines what should be a good standard working method for using key switches in Studio One with instruments that uses them for different articulations.
Approach: Enter a single note the entire length of the music clip. This serves two purposes:
- It populates the entire clip, no empty spaces, so that Preferences/Options > Advanced > Midi > Chase Long Notes (which should be turned on) always chases to the correct articulation.
- It allows you to easily split that note anywhere, say bar 17-24, and pitch it up or down for a different articulation there while still leaving no empty spaces that won't chase to the correct articulation.
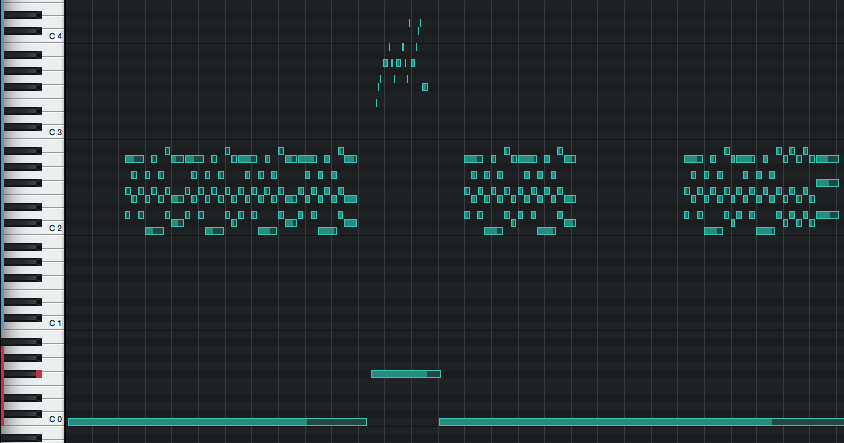
You want to have "full coverage" in the clip so that no matter where you start playback, the correct articulation always plays. See a simple example in the image below with PreSonus Symphonic Orchestra Big String Section KS.
The splits are easy to locate to the correct positions with the vertical editing crosshair. Preferences/Options > Advanced > Editing > Enable crosshair editing for tools.
Here is an example of how you may find the key range notes for your VSTi's Key Switches. Some VSTi that have key switches will start around the C0 note and up.
