This article will focus on how to edit more efficiently in Studio One's main arrange space. Once you become more accustomed to using the tools available to you, Studio One becomes a very efficient editor. It's always advised to get into the habit of using the most efficient tools as Studio One continues to tweak the workflow in various ways as it's development progresses.
Note: The methods described below apply both to Studio One 3.5.x and 4.0.
The Smart Tool
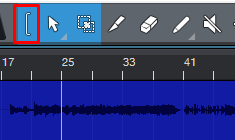
The Smart Tool as shown above allows getting the range tool in the upper half of a clip and the selection arrow in the lower half of a clip, effectively deprecating some previous workflow methods. It's highly recommended to leave it turned on.
In addition, because the Smart Tool only comes into play if the track height is Normal or larger, it's also probably a good idea to leave the Alternative Tool set to the Range Tool most of the time as shown below so that when the smart tool is not in play with smaller track heights, range selection is still easily accessible using the previous method with a modifier...

Doing the above allows much more efficient general editing of timeline clips such as...
- Clicking anywhere in the upper range on any clip or track lane to locate anywhere on the horizontal timeline.
- Double clicking anywhere with the crosshair in the upper range to split anywhere.
- Drawing a range selection and double clicking in the upper range to split the range(s)
#1 above is of particular use, not having to click the timeline ruler to locate anywhere. Some of the other splitting operations are shown in the gif below...
The above edits are all one handed operations and don't require a modifier, so for common editing actions using the Smart Tool can greatly improve the basic workflow.
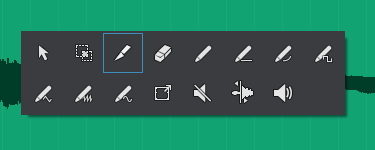
The other tools in the main toolbar are commonly used much less often but can easily be accessed more efficiently by clicking the mouse wheel button to get the popup tool pallet. Another one handed operation not requiring any keystrokes or very much mouse travel.
Event Selection
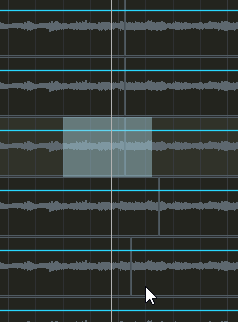
It often escapes many users that event multi or marquee selection in Studio One can be performed from any edit view simply by holding the shift modifier and dragging directly across events, that it's not necessary to make marquee selections by starting the drag from an area with empty arrange space. See the animated gif below. Remembering this can also improve general editing speed.
Automation Editing
There is also a default tool for automation editing as shown below, the Trim tool. This tool when used along with the Smart Tool allows very efficient editing of automation levels. The automation bracket tool appears in the upper range of the track lane when editing automation.
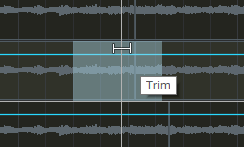
What makes this method so efficient is that any range selection like in the following image applies across all tracks in that same horizontal range. In other words, using the Trim tool on any other track will adjust the automation in that same range ...
The above is a one handed operation as well which requires no modifiers. For tweaking automation for a particular section of a song across multiple tracks, having a range on any track limits the edit scope to that range for any other automation envelope.
Timing Edits
Because we Studio One users have so many fantastic tools available for correcting timing, we also often enough don't see the forest for the trees. As you edit in Studio One always use the most efficient approach for a particular case which for minor timing correction may not actually be Audio Bend or Melodyne ARA or quantize.
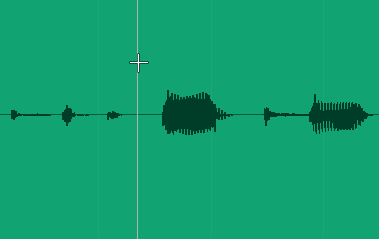
The example below assumes that a random section of audio in an otherwise good performance Is a tiny bit out of time. In those kinds of isolated cases it's often much more efficient to slip edit the audio section rather than reaching for one of the more complex or advanced tools.
In the animation below we're using the Smart Tool to draw a range around the event, then double clicking in the upper area to split that range, then using Ctrl + Alt (Windows) to slip edit that section into a better time position. Lastly we're hitting X to cross-fade (always crossfade audio edits to avoid non zero crossing artifacts) .
Of course, if after the slip edit you need to trim the event or adjust a crossfade position because some other parts crossed over, do that as well.
Please always take advantage of the most current or up to date or efficient workflow methods in Studio One. If or when a new version adds better methods for some things later, change your working habits to use those better methods and try not to get stuck in a rut using potentially outdated workflows from earlier versions.
The developers add those small things intentionally and commonly so that you can spend more time critically listening to the music and not so much fiddling with the user interface.