Why do I have to do a Firmware Recovery to update to this firmware version?
With the arrival of the highly anticipated StudioLive CS18AI controller, a number of changes were made to the AI family of mixers, both StudioLive AI Consoles and StudioLive RM Series mixers. Because these changes involve things outside the scope of a regular Firmware Update, they will require what is known as a "Firmware Recovery".
A Firmware Recovery is similar to a Firmware Update, but the process you follow is slightly different, and instead of merely updating the mixer, it actually reloads the mixer's entire firmware image, which will reset the mixer to a factory default state. Because of these differences, updating to this firmware will involve a different process than what you are used to, which may include backing up any important Scene and Preset data you have saved on your mixer.
It is also for this reason that Network Firmware Update will not be available for this release. Because a Firmware Recovery is required in order to see all the changes in this update, it is important that all AI Mixer users perform the Firmware Recovery process to update their mixers.
***************************************
It is highly recommended that when doing firmware updates or the Firmware Recovery process that you use a Sandisk USB flash drive as mentioned in the following knowledge base article. Some flash drives will not work correctly for Firmware Update and/or Firmware Recovery:
SanDisk Cruzer USB Flash Drive Compatibility with StudioLive AI
***************************************
NOTE: Please follow the instructions in the two videos below to perform the firmware recovery on your mixer
Creating a USB Recovery Drive and Mixer Backup File:
AI Console Firmware Recovery Process:
---------------------------------------------------------------------------------------------------------------------------------------------------------
For A List Of Firmware Recovery Steps Shown In The Video, Please See Below:
Please be sure to review all instructions before performing a Firmware Recovery on your StudioLive-AI Console mixer.
NOTE: Performing a Firmware Recovery on your mixer will erase user Scene and Preset data. If you have Scenes or Presets that you would like to save, you can copy these individual Scenes and Presets to your computer using the UC Surface Scene Manager.
You can altso create a Mixer Backup, as shown in the video above. This Backup file can then be restored to the mixer after the Firmware Recovery is complete in order to reload the Scenes and Presets you had saved previously.
It is important to understand that a mixer Backup will only backup your Scenes, Quick Scenes, Mute Groups, and Fat Channel, FX, and GEQ presets. It does NOT backup the current settings of the mixer. You must first save these settings as a Scene to the internal Scene Memory of the mixer so that a Backup will capture that information.
Firmware Recovery Process
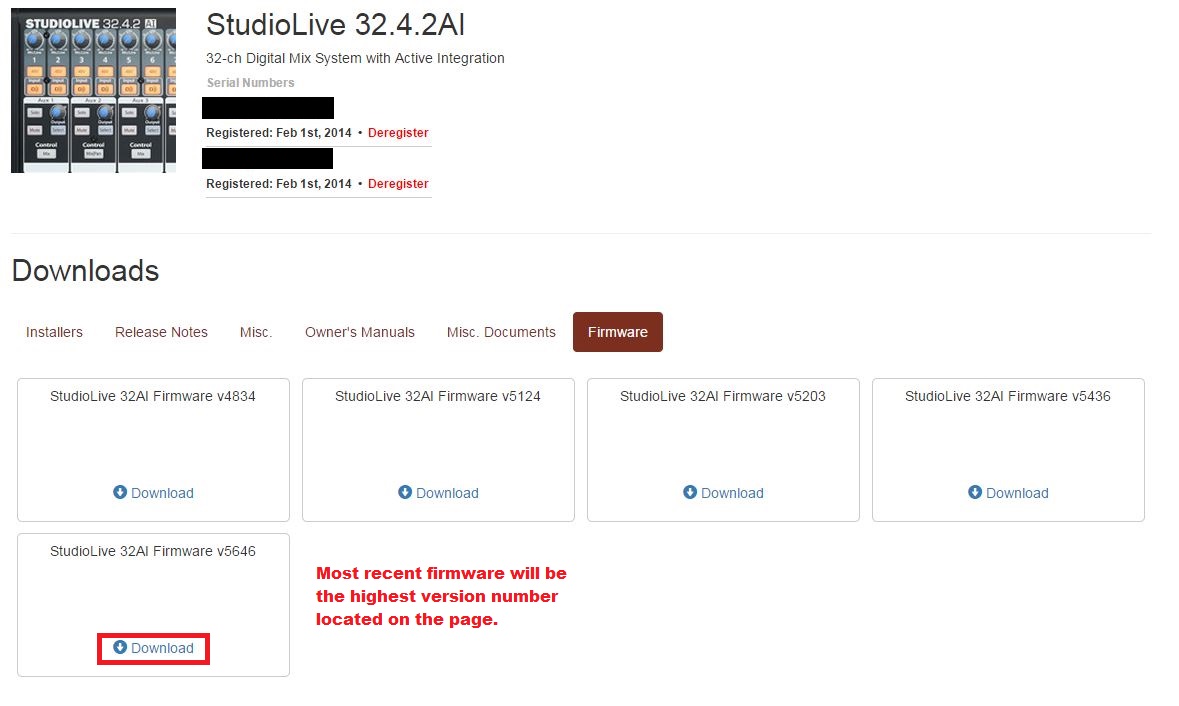
1. Download the firmware files for you mixer from your My Presonus account. To find these files, click on the "View More Details" link on your StudioLive registration and click the "Firmware" tab in the details area.
2. Open your downloads folder and locate the StudioLive-AI firmware download. The .zip file will be named with your mixer’s model number and the new firmware version (e.g., SL3242AI_v7045).

3. Depending on your system preferences, the firmware folder may not automatically uncompress from the .zip file. To expand it, simply double-click it.

4. Open the firmware folder; you will find four files inside. You will need all four files to upgrade your mixer:

5. Connect a FAT32-formatted USB thumb drive to your computer.
Power User Tip: Most small USB drives (16 GB or less) are already formatted correctly, so formatting may not be required, but if your mixer does not detect your thumb drive, we recommend doing a fresh format of the drive. Also, it is important that you use a drive no smaller than 1 GB and no larger than 32 GB in size. When in doubt, it's a good idea to go ahead and reformat your thumb drive as FAT32. On Windows, be sure to do a "Full" format as opposed to a "Quick" format. On Macs, the choice will be listed as MS-DOS (FAT)

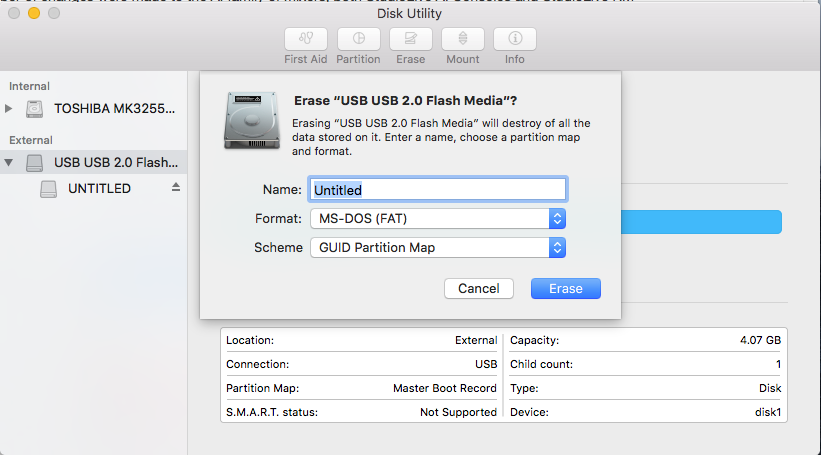
NOTE to Mac Users - If your Mac is running OS X 10.11 El Capitan or later, you will need to make sure to adhere to the following extra step in order to format a USB drive for loading firmware on your mixer (Users with Mac running OS X versions earlier than 10.11 can skip to Step 6):
Leave name set to "Untitled" & set Format to "MS-DOS (FAT)"
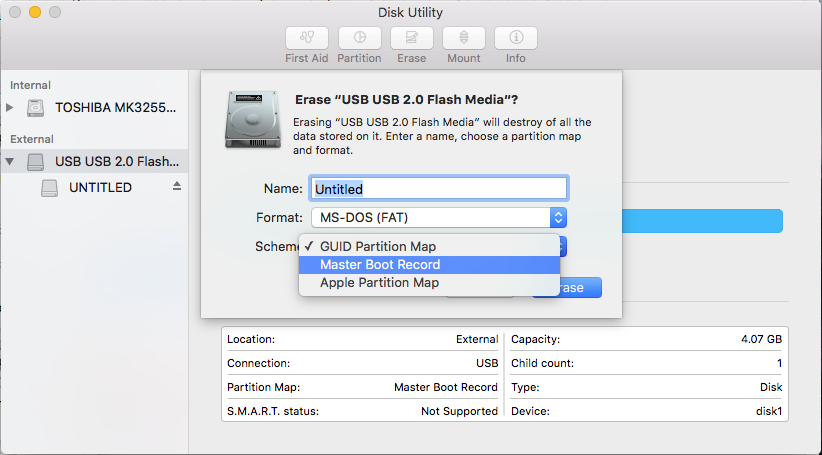
Change Scheme type to "Master Boot Record"
After verifying your settings look like the screenshot below, click "Erase"
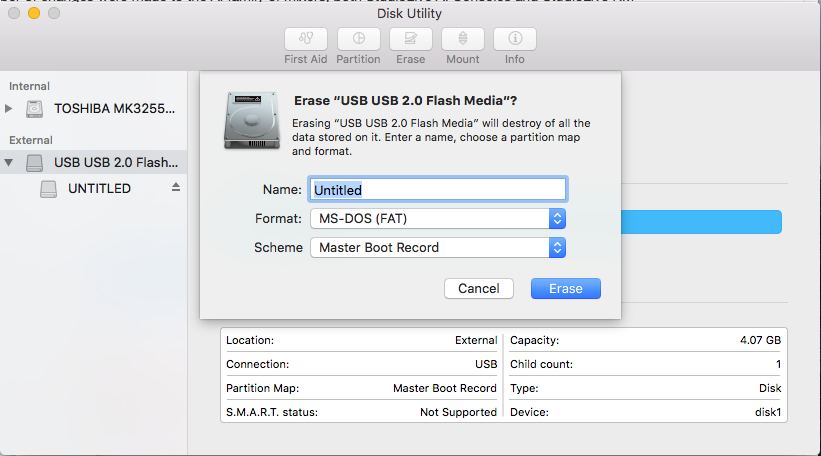
Once the format is complete, move on to Step 6...
6. Select all four firmware files and either copy/paste or drag them to the root of your thumb drive. Eject your drive and disconnect it from your computer.

7. Turn off your StudioLive mixer.
IMPORTANT: There will be a small pop on the outputs when the mixer boots after a firmware upgrade. Be sure to either disconnect the outputs of the mixer from any live amps and speakers, or power off the amps and speakers in addition to the mixer.

8. Next, take a Philips head screwdriver and on the back of the StudioLive mixer, loosen the screws securing the option card. Pull the option card out an inch or two so that it is no longer seated in its internal slot.

9. Remove the Wi-Fi LAN adapter (if connected). Plug the USB Flash drive into the USB port at the top of the mixer.


10. Power your mixer on and it will start the Firmware Recovery process, displaying the message "Restoring Firmware". Do not power your mixer off until instructed to do so.
NOTE: This process should take about 10 minutes to complete. Once completed you will get a message stating: "Power off your mixer, insert the option card, and power the mixer back on."

11. Follow the directions, power off the mixer and re-insert the option card firmly to make sure it is seated. Re-tighten the thumb screws to secure the option card.
12. Remove the thumb drive. You can also insert your USB WiFi adapter (if you need to connect wirelessly to your router)


13. Power your mixer back on.
NOTE: Be sure that your speakers are powered off or disconnected, as there will be a small pop when the mixer reboots.
14. It will take a minute or so for the mixer to complete the update. You may see a message on the screen about “Updating Control Surface”. Once the process is complete, your mixer will finish the normal boot process and be ready for use again.
For more detailed information on the Firmware Recovery process, see here