16 Nov 2020
*** Please download Universal Control by finding your mixer in the Downloads Page, and download the latest version from there. These instructions are completed with this version on your Classic 16.0.2, 16.4.2 and 24.4.2 mixer.
Backups of all types are very important for a variety of reasons. A backup can often save you time and trouble should you have some sort of system issue or hardware/software anomaly. Your Studiolive and VSL work together to provide you with the ability to not only create and store Scene's and Presets, but also to back them up in case you need to recover from some unforeseen issue.
You should always do a backup before the following:
- Installing a new version of Universal Control
- Performing a Firmware Update
- Performing a Factory Reset
- Modifying your computers hardware
- installing OS updates or re-installs of the OS
It is also advised that you perform backups of all your presets and scenes on a regular schedule (once a week, once a month, etc.).
You can read about the VSL browser functions, including scene and preset backup and transfer in section 3.2 VSL: Browser, starting on pg 23 of the latest StudioLive Software Library reference manual:
NOTE: If you are connecting two StudioLive 16.4.2 mixers, be sure to save the scenes from the individual mix pages. One page will not save both mixer's presets and scenes.
*************
How to Back Up Your Scenes:
1. When you first launch VSL, you will need to create a link between
your StudioLive‘s internal memory and your computer. To do this,
click on the Get button.

2. VSL allows you to back up your Scenes, Fat Channel, FX, and graphic EQ
presets and permanently store them on your computer. Each type of
preset can be added separately. In this way, you can back up only what
you want, when you want.
To move a Scene or preset from temporary memory into
permanent memory, simply select one preset or Scene and
click the Add to Disk button. To select multiple presets,
hold the Shift key while making your selections (Cntrl gives you single select).

***Once you have your scenes in the on the Disk Section of the browser,
you will be able to find them in Documents > Presonus > StudioLive > Library
And you should be able to retrieve them their.
These files can be emailed, put on a jump drive, or burned to a CD easily and transferred.
These files can be emailed, put on a jump drive, or burned to a CD easily and transferred.
Browser locations of the Scene/preset files:
PC = C:\Users\[Username]\Documents\PreSonus\StudioLive\Library\
Mac = MacHD/Users/[Username]/Documents/PreSonus/StudioLive/Library/
Sending your Scenes and Presets back to the mixer:
VSL makes reorganizing all the Scenes and presets stored on
your StudioLive as easy as dragging-and-dropping a file. To load
your StudioLive with new Scenes and presets, simply drag any
Scene or preset from the On the Disk section of the Browser to
any position in the Device Memory section of the Browser.
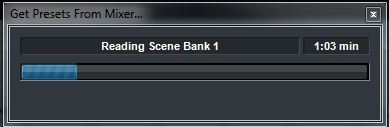
Press the "Get" button on the VSL Browser to receive the device's memory
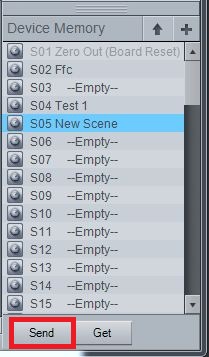
See how I have a scene labeled "New Scene" now that has been
dragged and dropped into the "Device Memory."

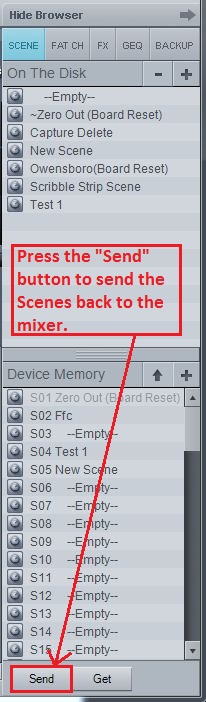
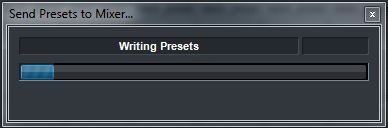
To send your Presets back to the mixer, simply hit the
"Send" button on the Device Memory. Once this is done,
The Scene Memory on the mixer will populate the scenes
in the exact order in which they were stored on the Device
Memory section of VSL.
*********************************
*********************************
Create and Restore Backups of you Mixer:
The backup tab allows you to create complete time-stamped snapshots
of your StudioLive. This can be especially useful when completing a project
that may need to be revisited in the future. To create a backup, simply click
on the Backup button.
Click on The Browser "Backup" here:

And then press the Backup Button on the "Device Memory":

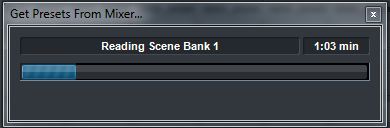
The screen will then read:
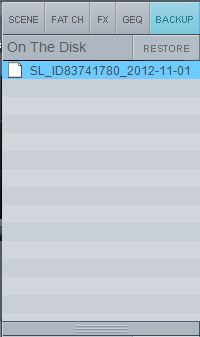
The backup will then show up like so in your "On the Disk" Section:
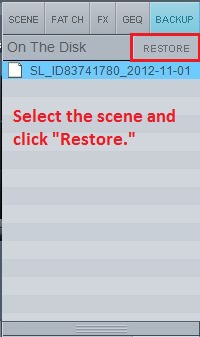
Restoring from a Backup:
To restore an backup file, select it on the "On the Disk" portion of the Browser
and click the Restore button.
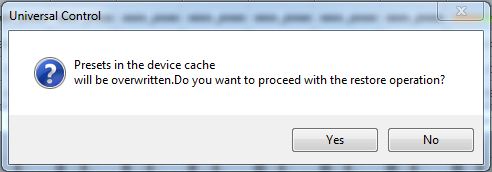
You will be warned that any Scene or Preset currently loaded in the Device
Memory section of the Browser will be overwritten. Click "Yes" to continue.
Once your backup is restored you can click the Send Button to transfer your Scenes and presets
Back to the StudioLive.