This article applies to the FaderPort that looks like this:
How do I set up my FaderPort Classic in Cubase/Nuendo in Native Mode on Windows?
Native Mode support for the FaderPort Classic requires installation of the Faderport Classic DAW Profile / FaderPort Control application released on July 10, 2018.
1. Visit the FaderPort download page to get the release and run it to install it.
2. Run your DAW with FaderPort Classic connected.
3. A Presonus Faderport Classic option should now be available in the Device Setup list the next time you launch Cubase/Nuendo. Proceed with setting up your Faderport Classic as described below.
Setting Up the FaderPort in Cubase/Nuendo
1. In Cubase/Nuendo, go to Devics > Device Setup
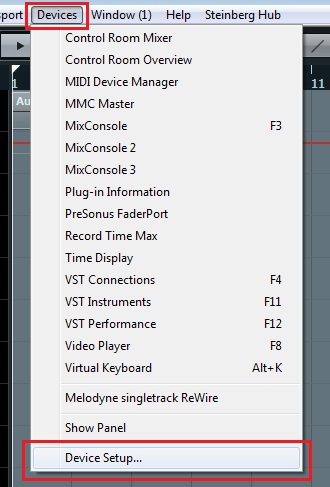
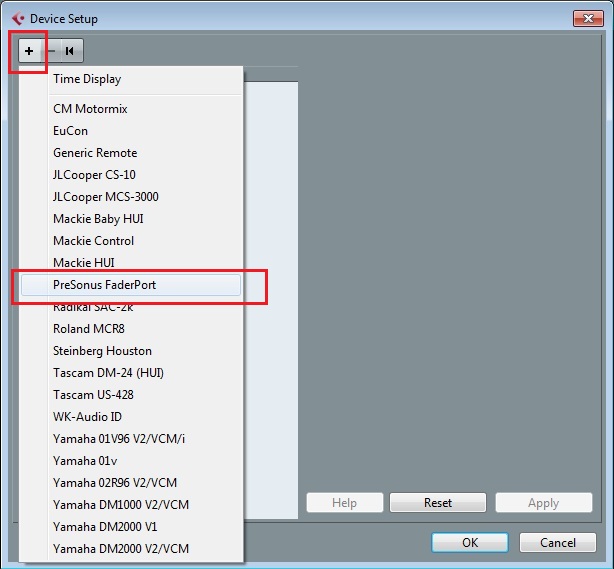
2. Click the + symbol to Add Device, and choose the Presonus Faderport. If you don't see the option for Presonus Faderport, see the note at the beginning of this article
3. There should now be a listing under Remote Devices for the Presonus Faderport. Make sure the MIDI Input and Output ports are set to Faderport
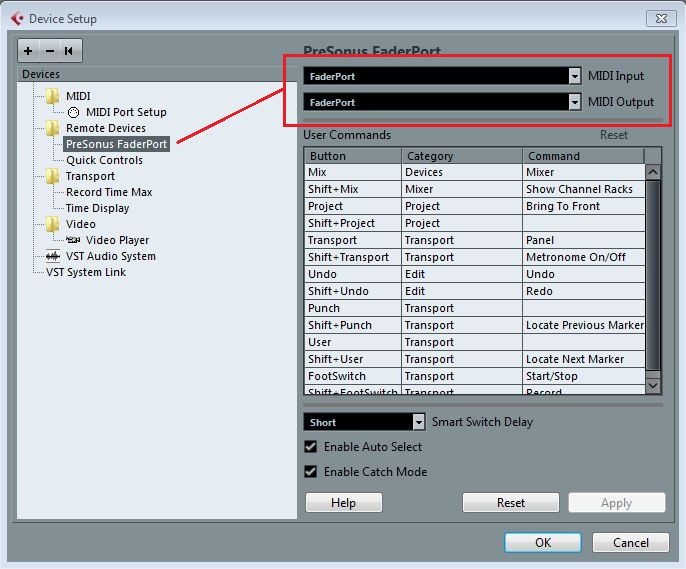
4. Additionally, since the Faderport is a control surface and not a MIDI instrument or controller/keyboard, make sure you un-check the Faderport from In All MIDI under the MIDI Port Setup section

Your Faderport Classic should now be ready to use!